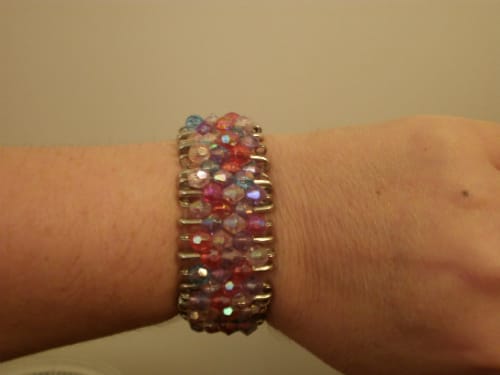
Have you seen a safety pin bracelet before? They are really cute! I’ve been wanting to make some for a while now. You’ll be surprised just how simple they are to make. It’s a great activity to do with your older children.

You’ll only need 4 things to make this bracelet.
1 inch safety pins
Clear stretchy cord (found in the bead section of the craft store)
Faceted multicolored beads (the really small ones)
Scissors
1. Using your wrist as a guide, cut two pieces of stretchy cord of equal size. Allow enough cord to go around your wrist with a couple of extra inches, to tie off the ends.

2. Place 3 beads on each safety pin and securely fasten. Set them aside for later use.

3. It’s easier to make your bracelet if you have created a pattern first. Create a pattern placing the beads top up, bottom up, top up, bottom up, repeating this pattern. Be sure that all of the beads are facing upward and that the beads are all facing to either the left or right. Continue this until you have enough beads to make your bracelet.

4. It’s time to string the bracelet. Using the two pieces of stretchy cord that you have already measured, thread one through the tops of your safety pins and the second through the bottom. Take care not to get your cords tangled up and keep the bracelet straight while stringing.
5. Make sure the bracelet is long enough to fit around your wrist. Holding both ends of the bracelet, carefully turn it over and fold it in half, so you can tie the ends of the cords together. Tie the ends of the stretchy cord together, being sure to make a tight not. You may want to make a double knot. Cut off the excess cord from the ends. You’re now ready to wear your safety pin bracelet!
Related articles
 Summertime Crafts for Kids :: DIY Oven Baked Clay Beads
 Planning a Unique Family Vacation #AlamoDriveHappy
 Pony Beaded T-Shirt Craft
 10 Creative Ways to Reuse Throwaways
 How to Make a Mother’s Day Corsage with Ribbon Roses


