
I have the perfect personalized gift to share with you – tile photo coasters! Read on to find out how to make photo coasters of your own in just a few easy steps. I think you’re going to really enjoy this project! Today’s DIY Photo Coasters Tutorial is sponsored by Famowood Glaze Coat.
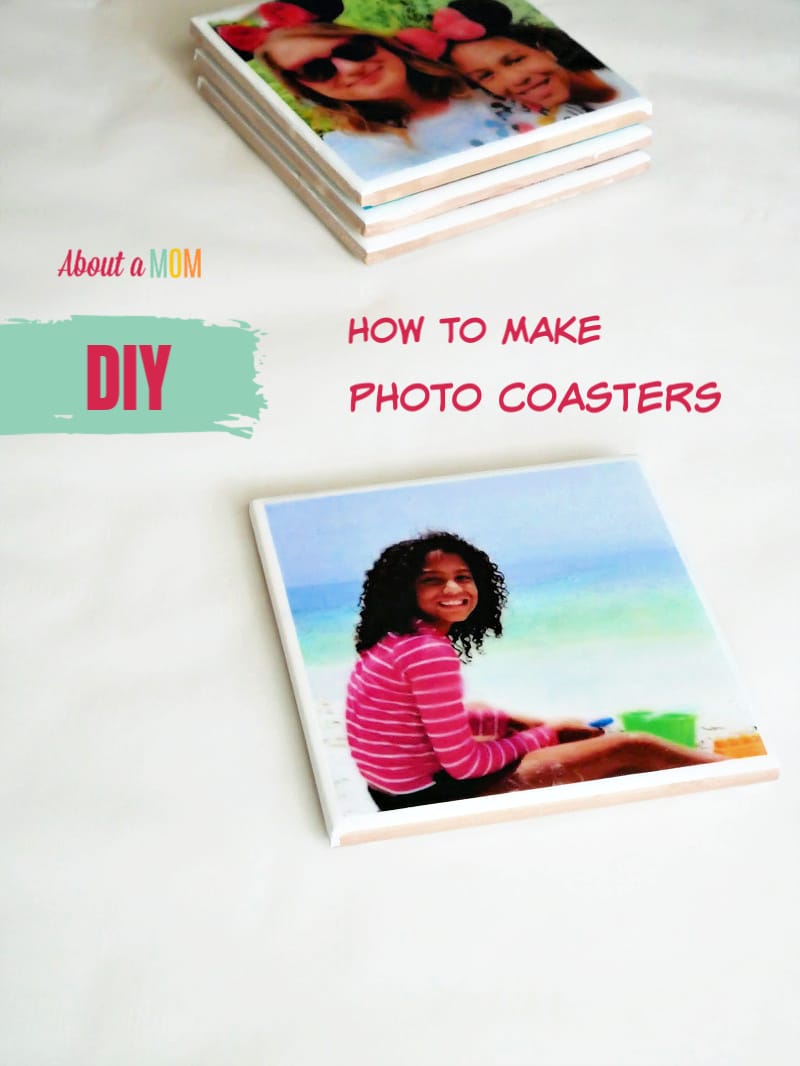
Do you take a lot of photos? I must admit that I take way too many pictures. A trip to a theme park could easily result in hundreds of pics. I feel like it is such a shame to have all these memories sitting on my phone or stored in the cloud. I want to enjoy them, but there is only so much space on my walls. These DIY Photo Coasters are incredibly simple and inexpensive to make, and a fun project that will bring your photos to life.
I’m such a sucker for personalized photo gifts, and now is a great time to make these tile photo coasters with both Mother’s Day and Father’s Day coming up. Also, with summer break coming up, I also like the idea of making another set of these highlighting our 2019 summer fun.
Have you ever wondered how to make coasters with photos on them? You’re not going to believe how simple it is! I’ve seen a lot of photo coasters tutorials on the web, using products that won’t really hold up to your hot and cold beverages. I was recently asked to try a product that solves all that. Famowood Glaze Coat is an ultra-clear epoxy resin that dries to a high gloss finish. It’s versatile enough for creating unique jewelry pieces or coating for use on almost any surface – smooth or rough, stained or painted, old or new. And, it is perfect for sealing and protecting these DIY tile photo coasters.

In addition to the Glaze Coat epoxy resin, you’ll need 3 plastic cups, a stir stick, 4×4 white tiles, craft glue, a foam brush, felt pads, photo prints or photos that have been printed onto copy paper or cards stock, and trimmed to size.
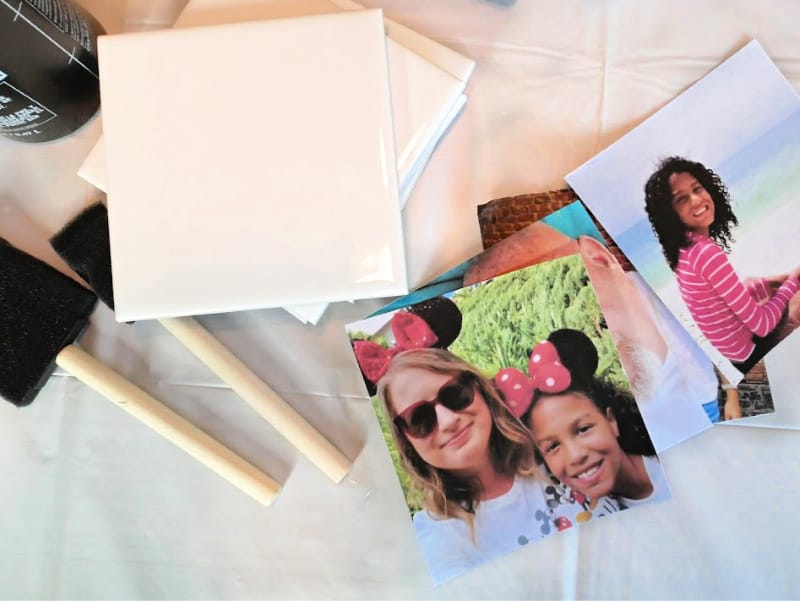
Note: I printed my photos onto all-purpose copy paper and it worked just fine. If you’re using a lighter weight paper like this, just be sure to apply a thin layer of glue. Otherwise, I think there might be potential for it to bleed through. If you happen to have white card stock on hand, and don’t want to worry about – great. Otherwise, I wouldn’t make a special purchase and stick with the copy paper.
The ceramic tiles can be found at your local hardware store. My local Home Depot had them for just 9 cents a piece, making this project super affordable.
How to Make Photo Coasters
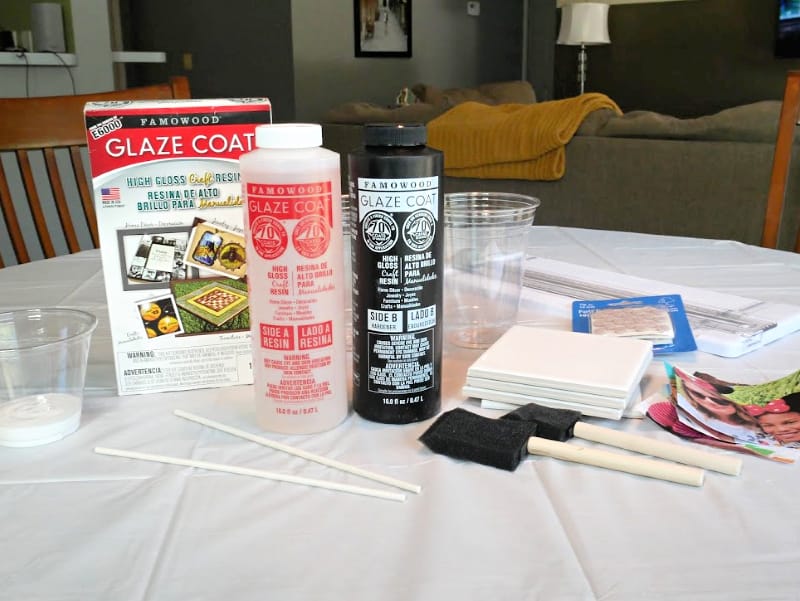
Supplies:
4×4 white ceramic tiles (find these at the hardware store)
4×4 photos (prints or photos printed onto copy paper or card stock)
craft glue or modge podge
foam brush
Famowood Glaze Coat epoxy resin
3 plastic (or paper) cups that unwaxed and disposable
stir stick
felt pads
waxed paper or parchment paper
plastic cloth
Directions:
Before beginning this project, be sure to read and follow the Glaze Coat instructions on package insert.
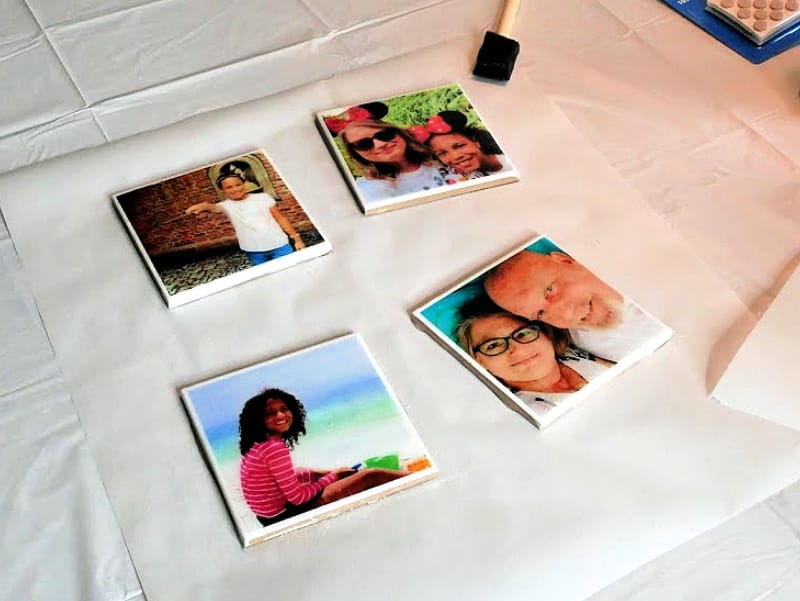
Print and trim photos to a 4×4 size. I used picmonkey photo editor to size my images to 384 x 384 pixels. This left just a small border on the tile. A paper trimmer works great for clean edges. Otherwise, trim photos with a pair of scissors.
Cover your work space with a plastic cloth to catch drips.
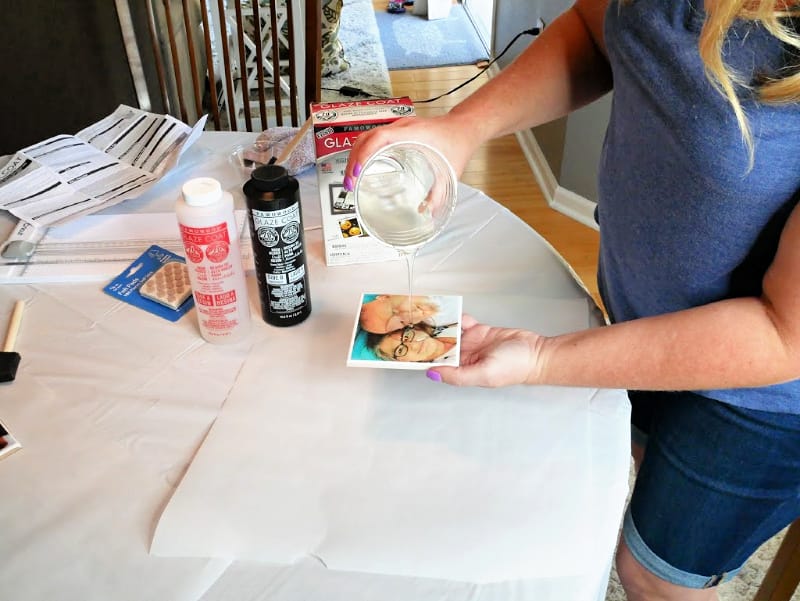
Use a foam brush to apply a thin layer of glue onto the back of a photo and afix to tile.
Repeat for all of your photos and tiles. Allow to dry completely, 1-2 hours.
Place a sheet of waxed paper or parchment paper down on your work space, and follow package directions to prepare the Glaze Coat. You’ll need one cup for the Resin, one for the Hardener, and one to mix the two. Measure equal parts Resin and Hardener into the first two cups, enough to coat your tiles.
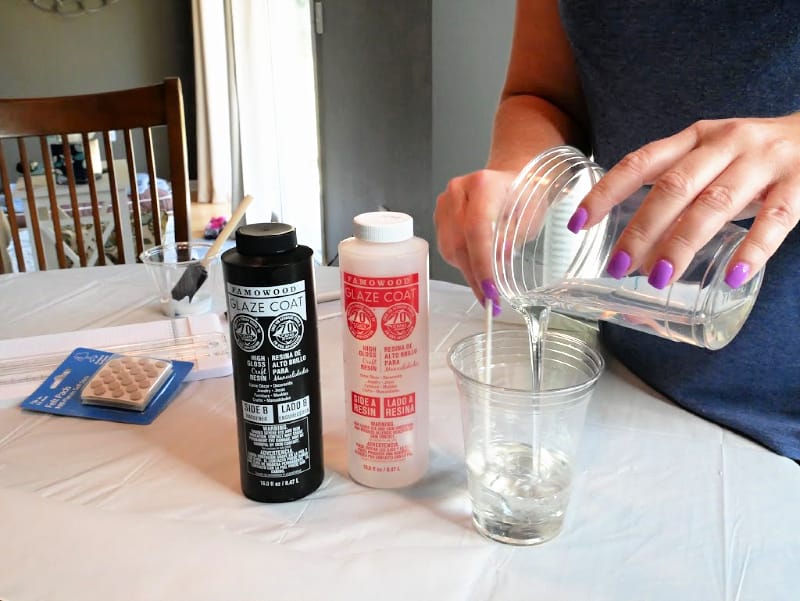
Carefully pour the measured Hardener into the container with the measured Resin. Mix with a wooden stick using gentle, steady revolutions. Be sure to scrape all sides and bottom of the container as you mix. For the second mix, pour the mixture into a clean cup and thoroughly mix for an additional six minutes or until temperature reaches 90 degrees F. It is extremely important that you read and follow all Glaze Coat package directions for steps 1 -3. Use my instructions for the Glaze Coat as a general overview. Don’t allow the mixture to sit or it will harden. Use right away.
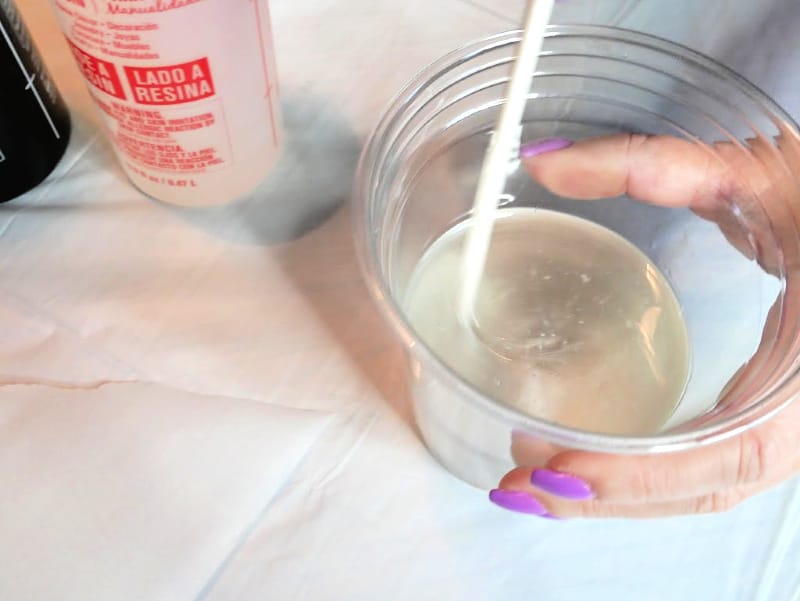
Important Note: Don’t allow it to sit. You’ll have about 15-20 minutes of working time after Glaze Coat is completely mixed before product begins to harden.
Pour Glaze Coat immediately onto the center of tile – using enough to cover the tile. Gently tilt tile from side to side until the entire surface is covered, allowing excess to run off. I didn’t find it necessary, but if you need to you can use a plastic spreader to smooth it out.
Should surface bubbles not disappear, they must be removed when surface is still wet. I had just a few minor bubbles on my coasters, but didn’t feel it necessary to pop them. Should you want to remove the surface bubbles, follow package instructions to remove using a small, handheld propane torch, butane torch or heat gun.
Place each tile onto wax paper to cure, in a dust free environment. You’ll need to keep dust away for approximately eight hours after pouring. A full cure will take approximately 72 hours. You may cover your project with a dust cover.
Note: Glaze Coat will be tacky while you are working with it. Wash hands right away, after coating the tiles. For clean up of tools and your work area, acetone or alcohol can be used.
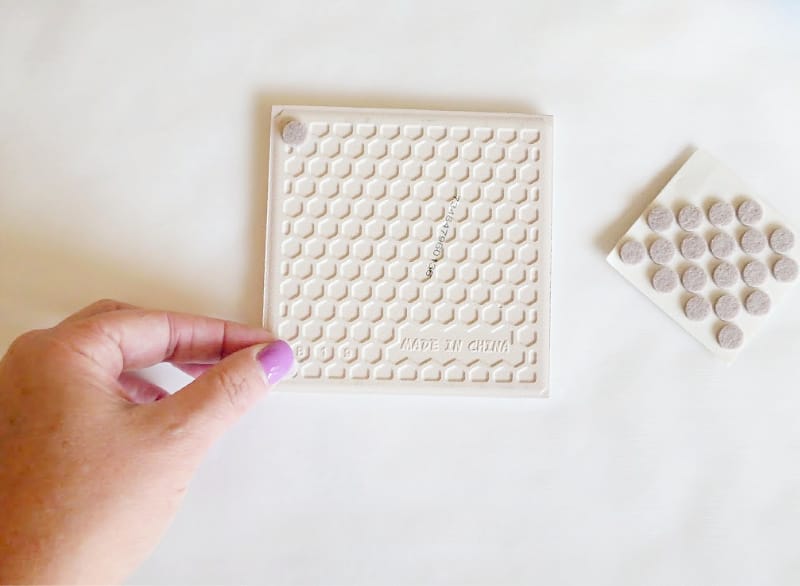
Once cured and completely dry, turn tiles over and stick a felt pad onto each corner.
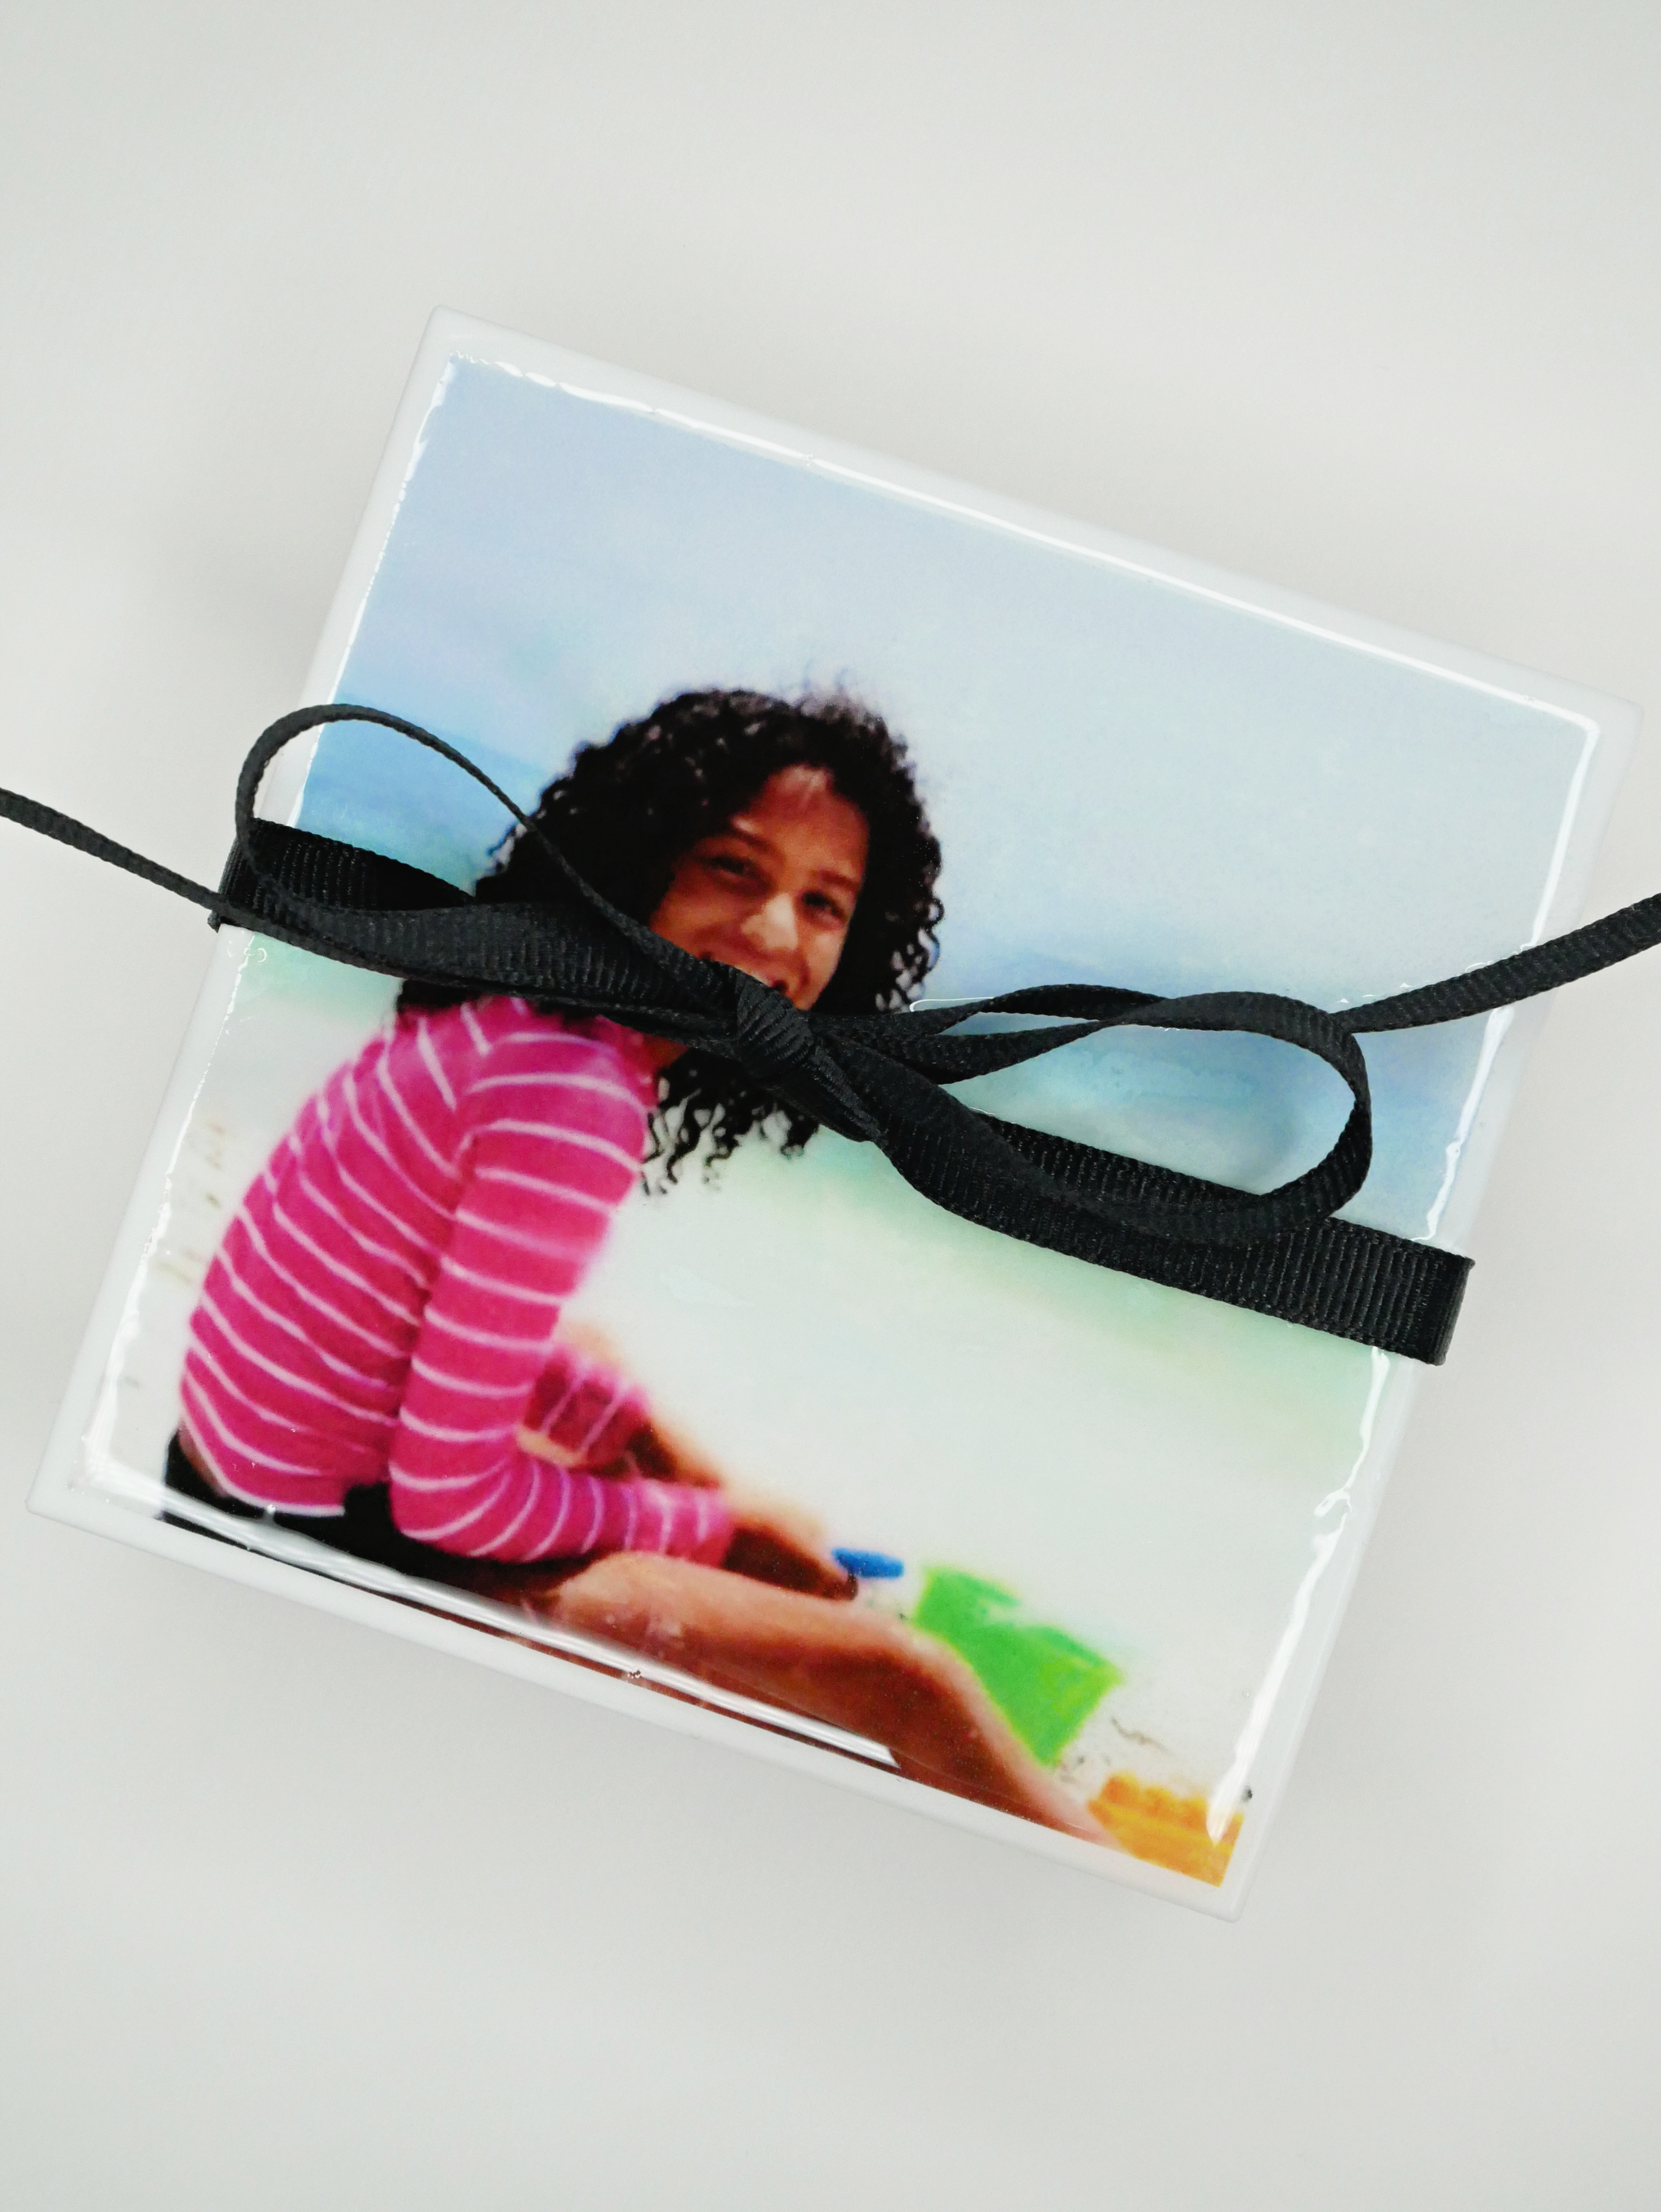
To gift, simply tie up in a bow! I think I’ll try black and white prints for my next batch of homemade photo coasters.
I hope you enjoyed my coasters with pictures DIY project! If you did like it, I hope you’ll PIN IT and share it with your friends! And, if you do make some of your own I hope you’ll share them with me. Feel free to tag @aboutamom on social media or leave a comment below.
Learn more about Famowood Glaze Coat products. Available at Lowes, Home Depot, Michael’s and many other retailers.
You might also like these:
Repurpose an Old Beverage Cart into a Garden Cart
Travel Journal DIY
Copycat LUSH Popcorn Lip Scrub
DIY Kitchen Herb Garden
What a fantastic idea!!! I like to make personalized gift baskets for the holidays, and this would make a nice addition!