Can you feel it?
It may be warm, but there is a crisp feeling in the air? Farmer’s markets are selling apples and pumpkins, and the pumpkin spice latte has returned!
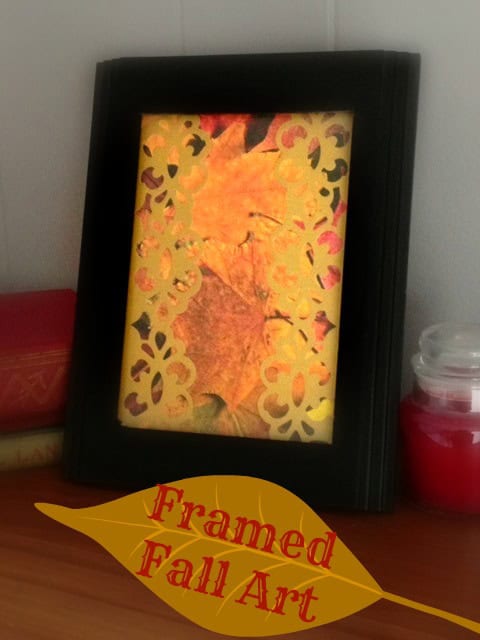
That’s right, it’s fall, which is my absolute favorite season. I love changing my mantle decor to reflect the change in the seasons, but I do not want to spend a lot of money doing it. That’s where dollar store decor comes it! In this case, all you need to create a beautiful piece of framed fall art is a frame and 2 pieces of scrapbook paper. I upcycled a frame I already had, so this craft cost me a grand total of $1.59, which was the cost of the scrapbook paper – actually less because I had a 20% off coupon for the craft store where I bought the paper.
Here is all you need to make a beautiful framed fall art piece to decorate your mantle with:
Supplies:
- a frame (free if you have one, or $1.00 at the dollar store)
- 2 pieces of scrapbook paper in fall colors or themes (I paid $1.59)
- a pair of scissors (on hand)
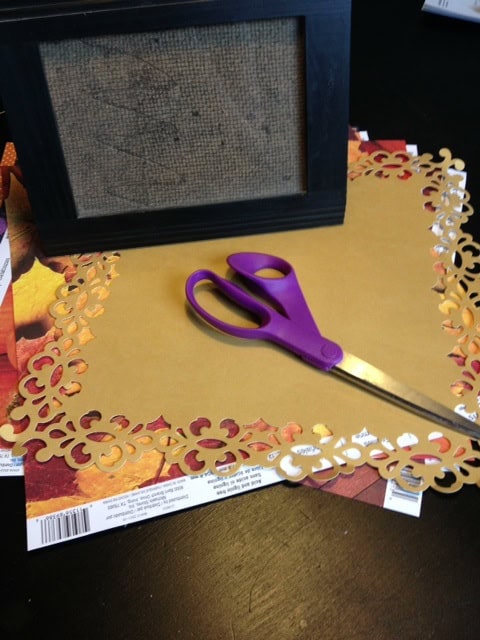
The craft store had a really pretty bronze piece of scrapbook paper with a cut-out scalloped edge, so I used that as an overlay for a second piece of paper which had an autumn leaf pattern. The first thing I did was cut out the scalloped piece, cutting a little longer than 7″, which is the length of my frame.
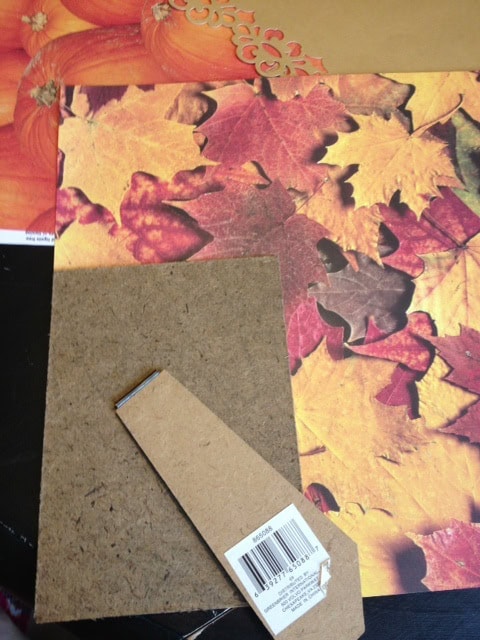
Next, I placed the back of the frame on my leaf patterned paper, and cut out around it. No measuring! Who has time for that?
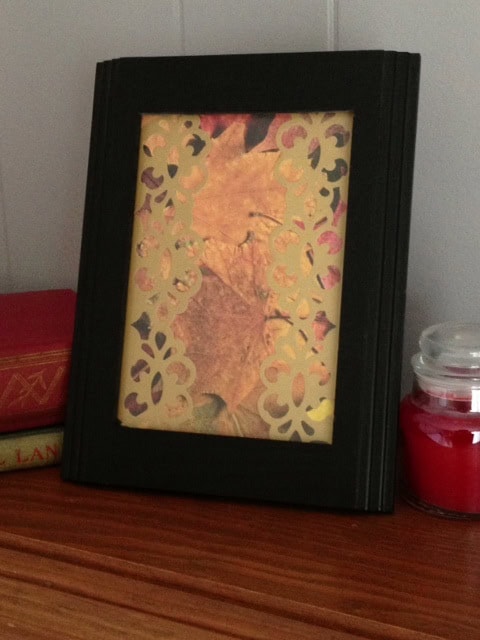
Finally, layer the cut paper inside the frame. The scalloped pieces go in first, then the leaf print, so that the leaf print paper peeks out from behind the cut-outs. It’s ok if some paper hangs out the back (mine did!) because no one will see it.
Now there is a pretty piece of seasonal art to really warm up my home decor for the change of season!

I really like this idea and I already have all these supplies. And thanks for telling me to cut around my frame backing – I think I would’ve done some measuring and marking!
I would love to this craft! It looks fun and affordable and something I could with my nieces and nephew!
What a great and cheap craft. Thank you very much for sharing with us all and have a lovely day.