• Skip to primary navigation
  • Skip to main content
  • Skip to primary sidebar

About a Mom

Inspiration for Motherhood

  • Dinner Ideas
    • Main Course
    • Pasta
    • Chicken
    • Casseroles
    • Vegetarian
    • Slow Cooker Recipes
    • Keto
  • Appetizers & Sides
    • Salads & Side Dishes
    • Appetizers
    • Bread
  • Sweet Treats
    • Dessert
    • Baking
    • Cookies
  • Kids Corner
    • Crafts for Kids
    • Kids Fun
    • Activities
    • Learning Activities
    • Food for Kids
  • Mealtime
  • Printables
  • Crafts
  • parenting
  • About
HomeFamily FunCrafts

Old World Stenciled Flower Pot Painting Idea

Angela SellariBy Angela Sellari
Angela Sellari
Angela Sellari Founder of AboutAMom

Angela is the founder of About A Mom and currently acts as a content creator and editor-in-chief for the About A Mom Team. She has been a professional blogger for over 10 years. Angela has appeared…

Expertise: Content Creation & Editing View all posts →

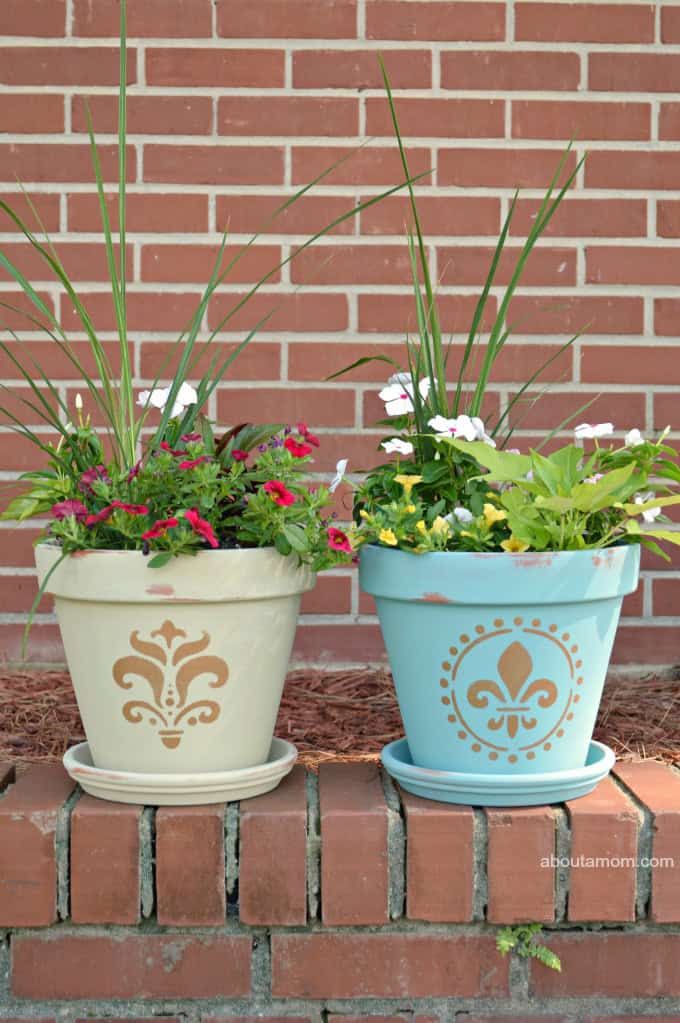
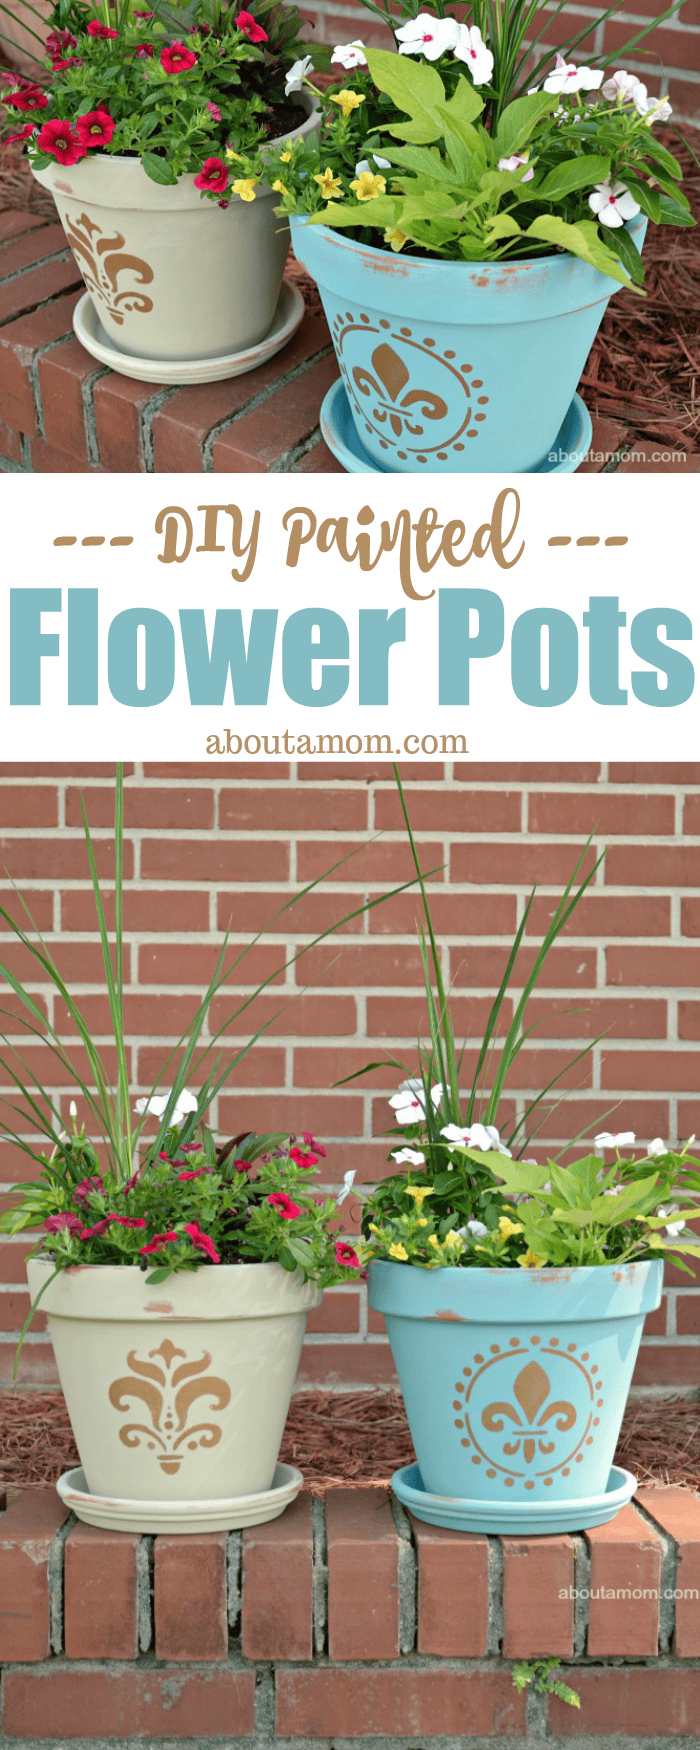
Painting your own flower pots is such a simple and inexpensive way to personalize and spruce up a patio, garden or entryway. This painted flower pots diy project can easily be achieved in an afternoon. All it requires is some terracotta pots, chalk paints, stencils and a trip to the garden shop.

A simple painted flower pot project. Beautify your garden with this flower pot painting idea using stencils and chalk paint.

My Mom and I actually did this flower pot painting project together, which seems fitting since it was Mother’s Day weekend. She did the painting and stenciling and I did the planting. Love that teamwork!

Painting terracotta pots isn’t an original idea, but I love how these painted flower pots turned out by using chalky paints and old-world style stencils.

A painted flower pots diy project, inspired by the MOTRIN® Make It Happen Weekends program.

I picked my stencils up at the local craft store, but there are some vert similar fleur de lis stencils available online that are perfect for this project. There are so many great stencil designs for painting flower pots.

Flower Pot Painting How-To

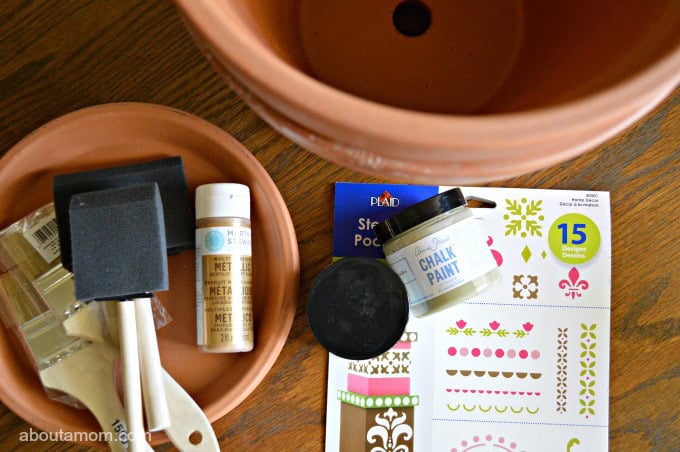
You can use our project for inspiration or duplicate it with the following supplies:

2 terracotta pots
chalk paint, in choice of colors
bronze acrylic craft paint
stencils
soft cloth
foam paint brushes
variety of plants

First, paint the pots with chalky paints. We used Anne Sloan Chalk Paints in the colors Versailles and Provence. However, there are less expensive brands of chalk paint that work just as well. We just happened to have some of this left over from another project. While the paint is still wet, use a soft cloth to gently wipe some of the paint off to give it an aged and distressed appearance. Allow the pots to dry completely.

Next, use your stencils and a bronze colored paint to add a design to the pots. We chose stencils that would give our flower pots an old world look. Let the paint dry completely, before planting.

A painted flower pots diy project, inspired by the MOTRIN® Make It Happen Weekends program.

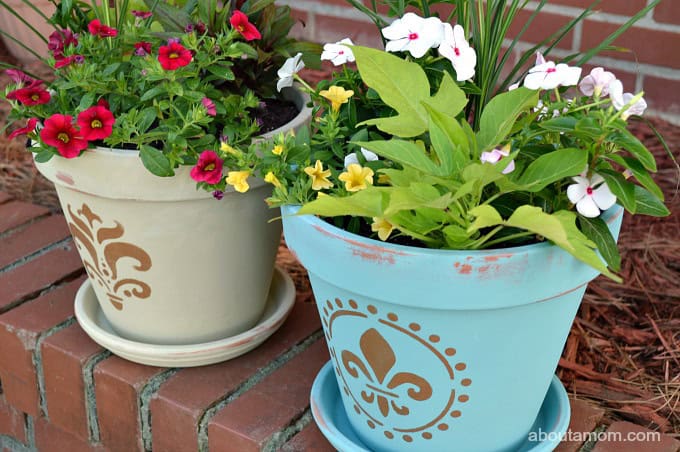
I put a variety of flowering and non-flowering plants in these pots. I think the varied textures and color look great. What’s growing in your garden this spring?

A simple painted flower pot project. Beautify your garden with this flower pot painting idea using stencils and chalk paint.

About Angela SellariContent Creation & Editing

Angela is the founder of About A Mom and currently acts as a content creator and editor-in-chief for the About A Mom Team. She has been a professional blogger for over 10 years. Angela has appeared in numerous TV segments, advertising campaigns and her work has been featured by many top publications. She lives in Tampa, Florida.

Reader Interactions

Published: May 11, 2015 | Updated: May 20, 2026

Leave a Comment Cancel reply

Have a question? Use the form below to submit your question or comment. I love hearing from you and seeing what you made!

Recipe Rating


  1. Robin (Masshole Mommy) says

    Posted on 5/11 at 1:15 PM

    Those are super cute. I love how they came out.

    Reply
  2. Carmen Perez (listen2mama) says

    Posted on 5/11 at 3:07 PM

    Aw these came out so beautiful. I love this idea, have to try this myself.

    Reply
  3. aimee fauci says

    Posted on 5/11 at 3:23 PM

    These came out perfect! I have to put the Twitter party in my calendar.

    Reply
  4. Liz Mays says

    Posted on 5/11 at 4:09 PM

    Those pots ended up pretty! It will be cool to learn some more DIY tips and tricks.

    Reply
  5. Jaime says

    Posted on 5/11 at 4:33 PM

    I have several terra cotta pots in my yard. They would be perfect for painting. I love this project!

    Reply
  6. Pam says

    Posted on 5/11 at 4:54 PM

    These turned out so pretty. I love the colors you chose!

    Reply
  7. Mama to 5 BLessings says

    Posted on 5/11 at 4:59 PM

    I love these! They turned really cute! I love the colors!

    Reply
  8. Jeanine says

    Posted on 5/11 at 5:16 PM

    These are gorgeous! I love DIY lower pots. They are so fun. These are so pretty.

    Reply
  9. Lady Lilith says

    Posted on 5/11 at 5:28 PM

    How cute. I love the DIY. This is great for kids as well. Thanks for sharing.

    Reply
  10. coolchillmom says

    Posted on 5/11 at 5:37 PM

    What a great craft! They did come out amazing

    Reply
Newer Comments
Brownie Caramel Cheesecake with a slice removed, topped with caramel and chocolate fudge drizzles.
Previous Post
Brownie Caramel Cheesecake Recipe
Cherry Limeade Cupcakes with green frosting, a maraschino cherry, and a red Twizzlers candy.
Next Post
Cherry Limeade Cupcakes

Primary Sidebar

  • About
  • Contact

Join The Club

Subscribe for inspiration straight to your inbox!

Sign Up

Let's Connect

Back to Top
  • Contact
  • About
  • Privacy
  • Terms
About A Mom is part of Waywith.