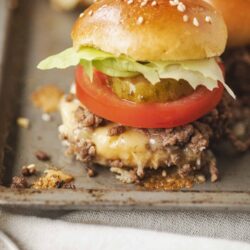
Just pull out a pan of these beefy, juicy, melty cheeseburger sliders, and you are voted the best mom in the world for the day again.
Few meals are as guaranteed to satisfy a large crowd or a big, hungry family—or just a couple of very hungry people—like a whole tray of cheeseburger sliders, all dripping with beefy juices, just a-swim in melted cheese, and full of savory, wholesome goodness.
Just take one bite of one of these cheesy, melty sliders, and savor it with an “mmmmmm,” as you reach for another slider with your other hand.
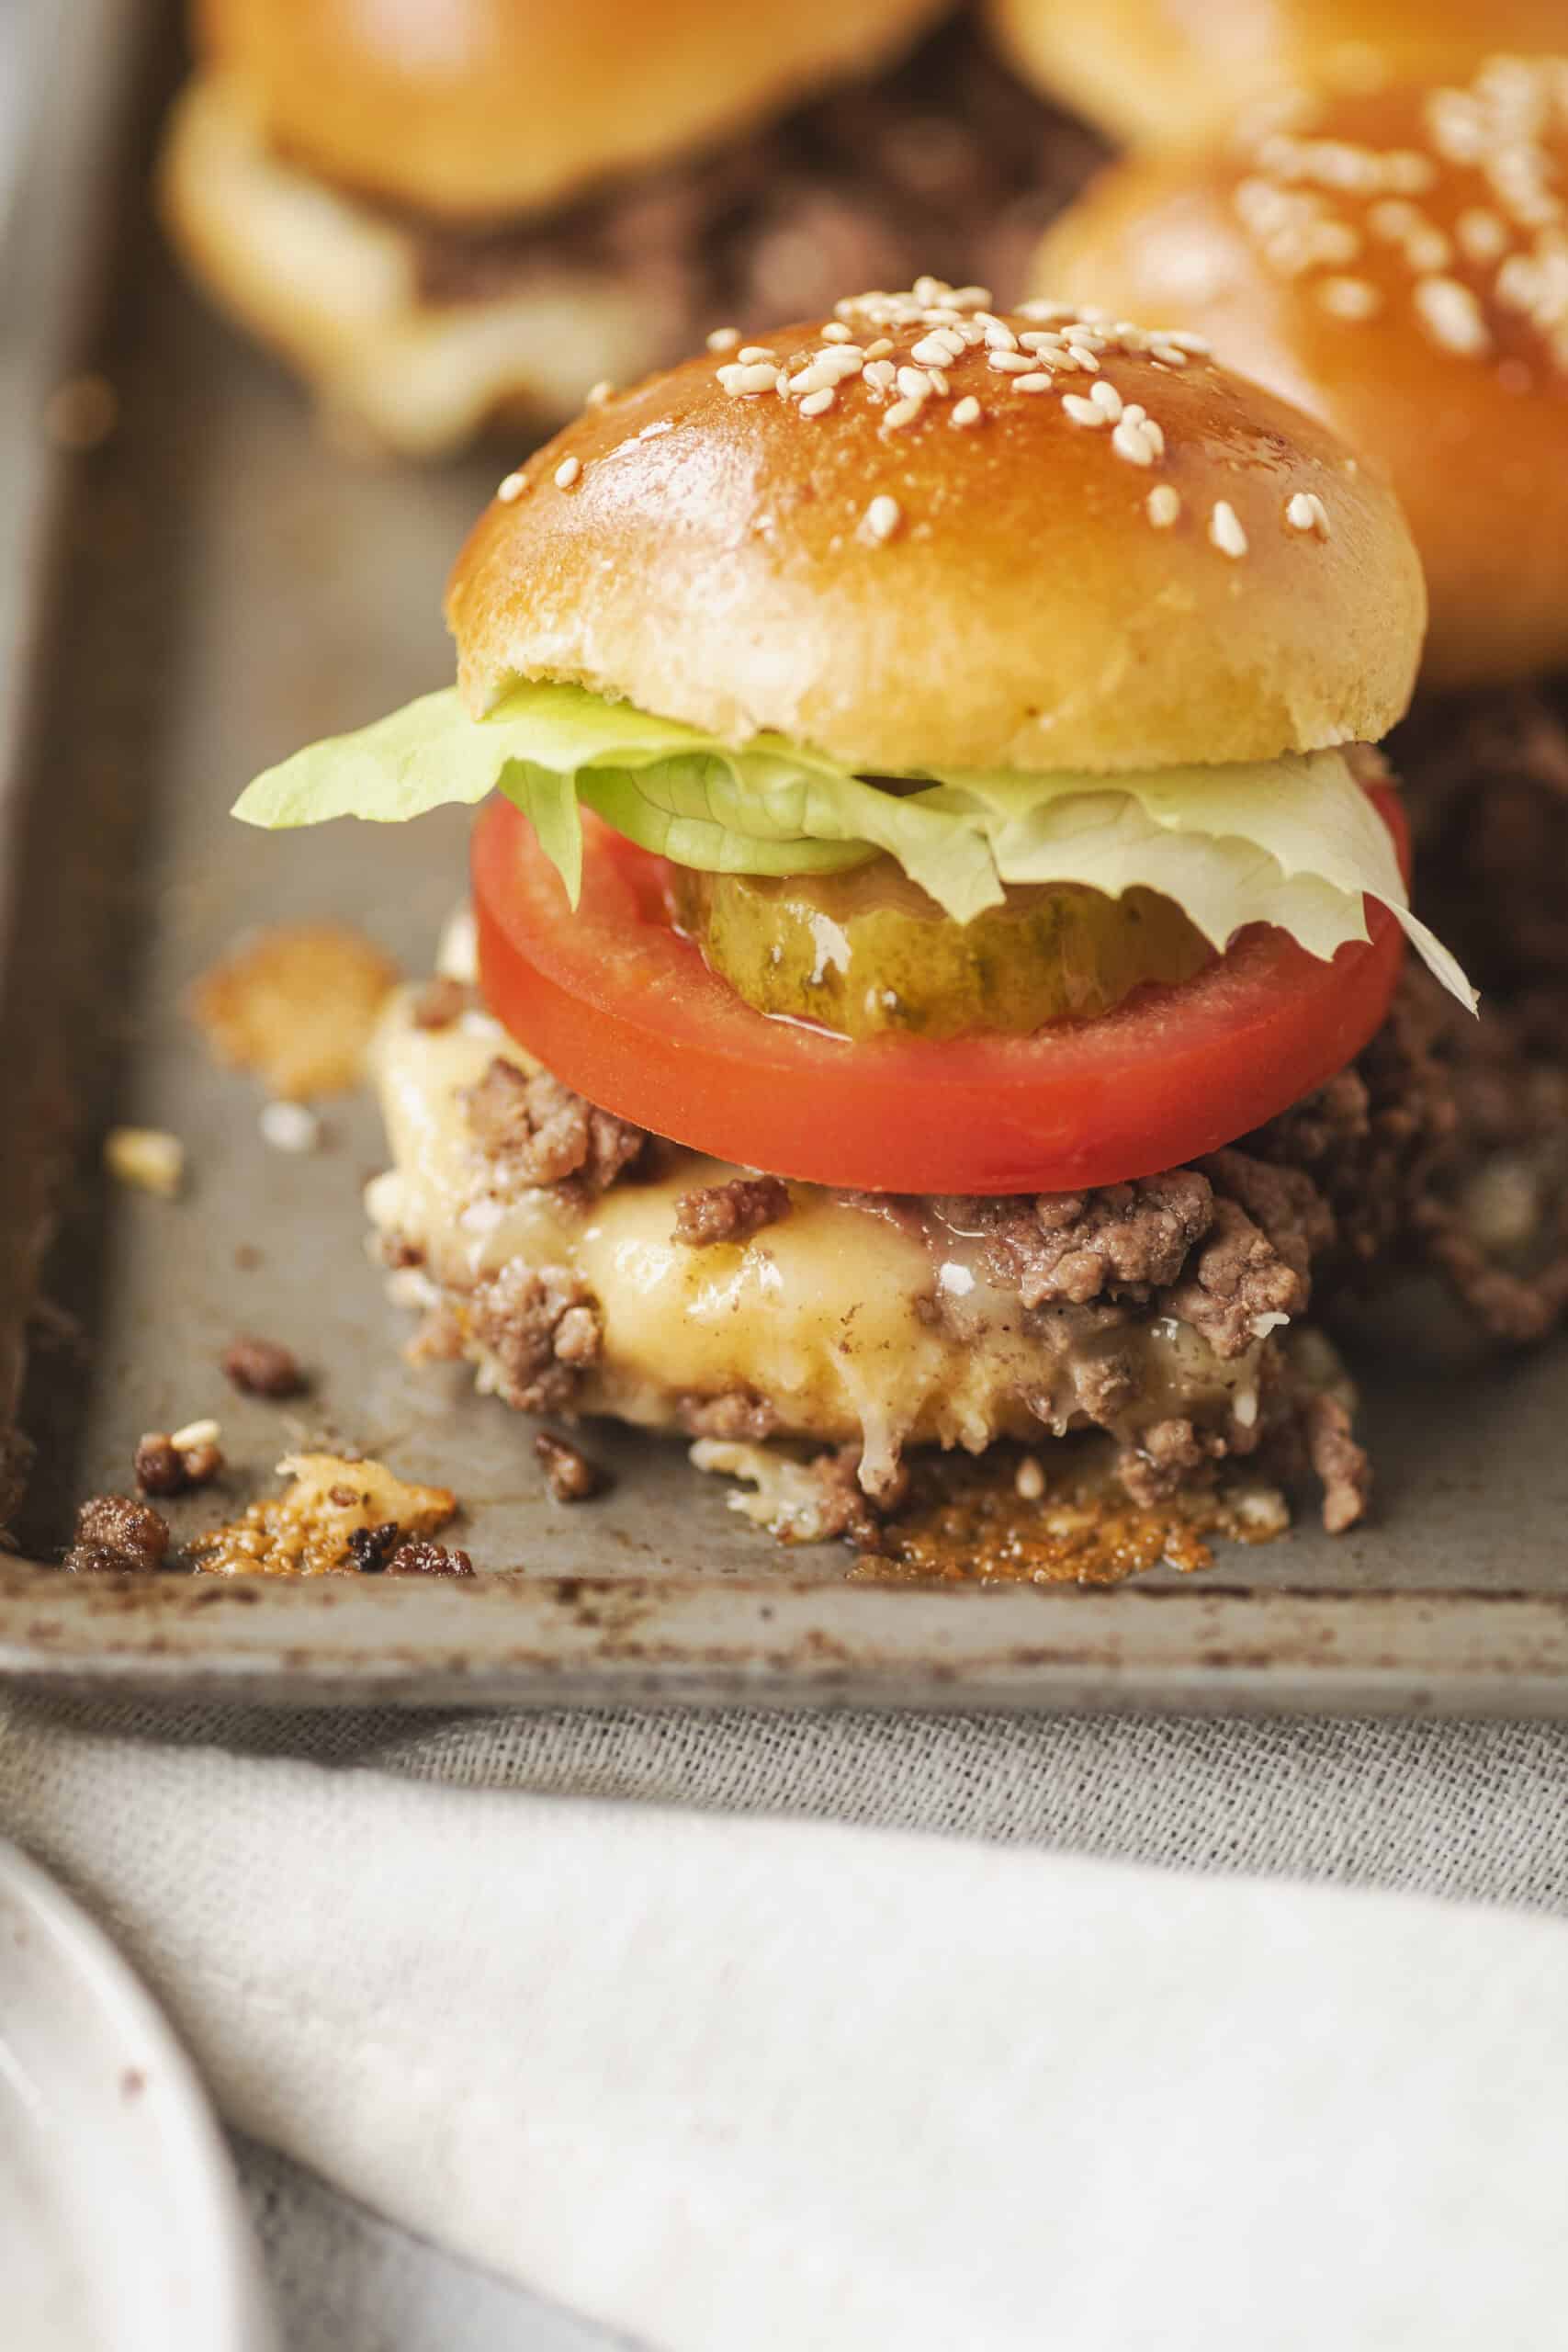
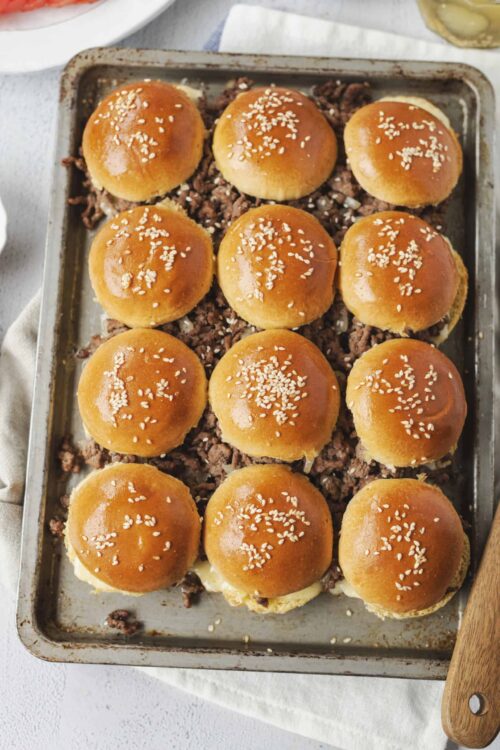
These cheeseburgers are so perfectly seasoned, with a savory blend of garlic powder, onion powder, salt, and pepper that really activates all the flavors in those baking burgers. You take these buttered, sesame-seeded, pillowy-soft cheeseburger clouds of savory heaven out of the oven after a mere 12-minute bake, and the cheese is all melty, the buns are all steaming and soft, the cheeseburgers’ aromas overtake the kitchen, and the crowd goes wild.
Why Cheeseburger Sliders Are The Thing to Have For Dinner Tonight
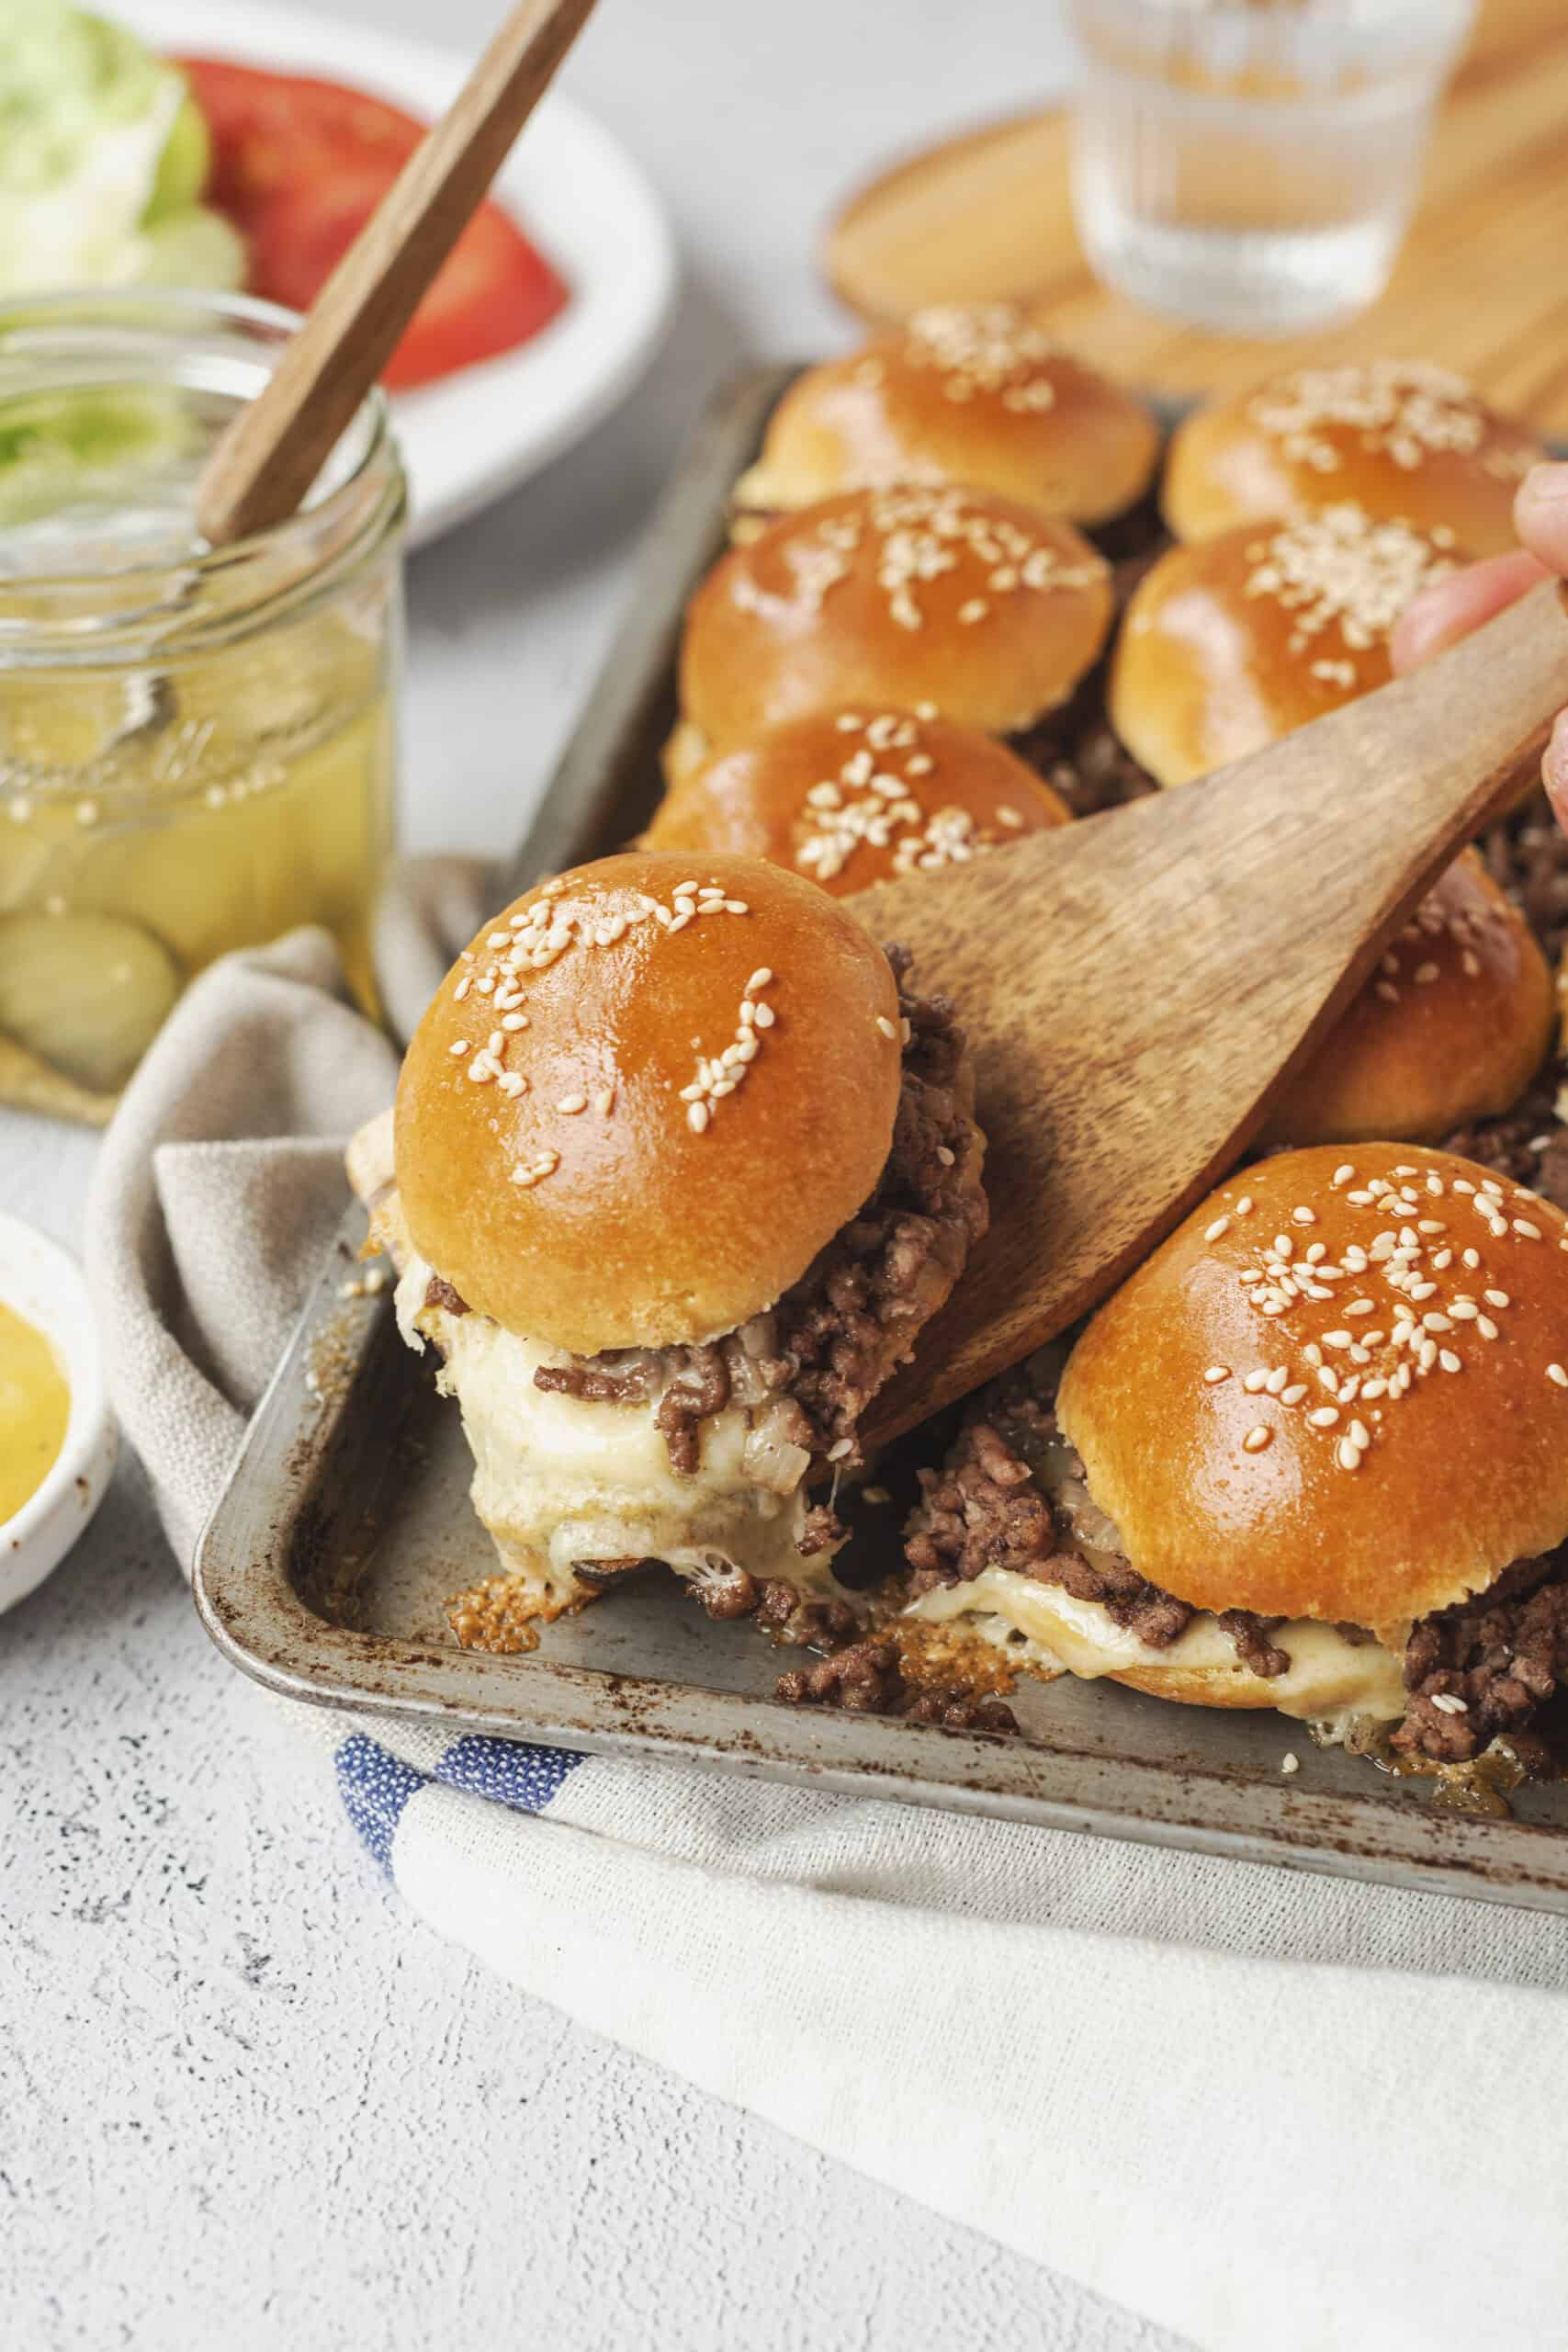
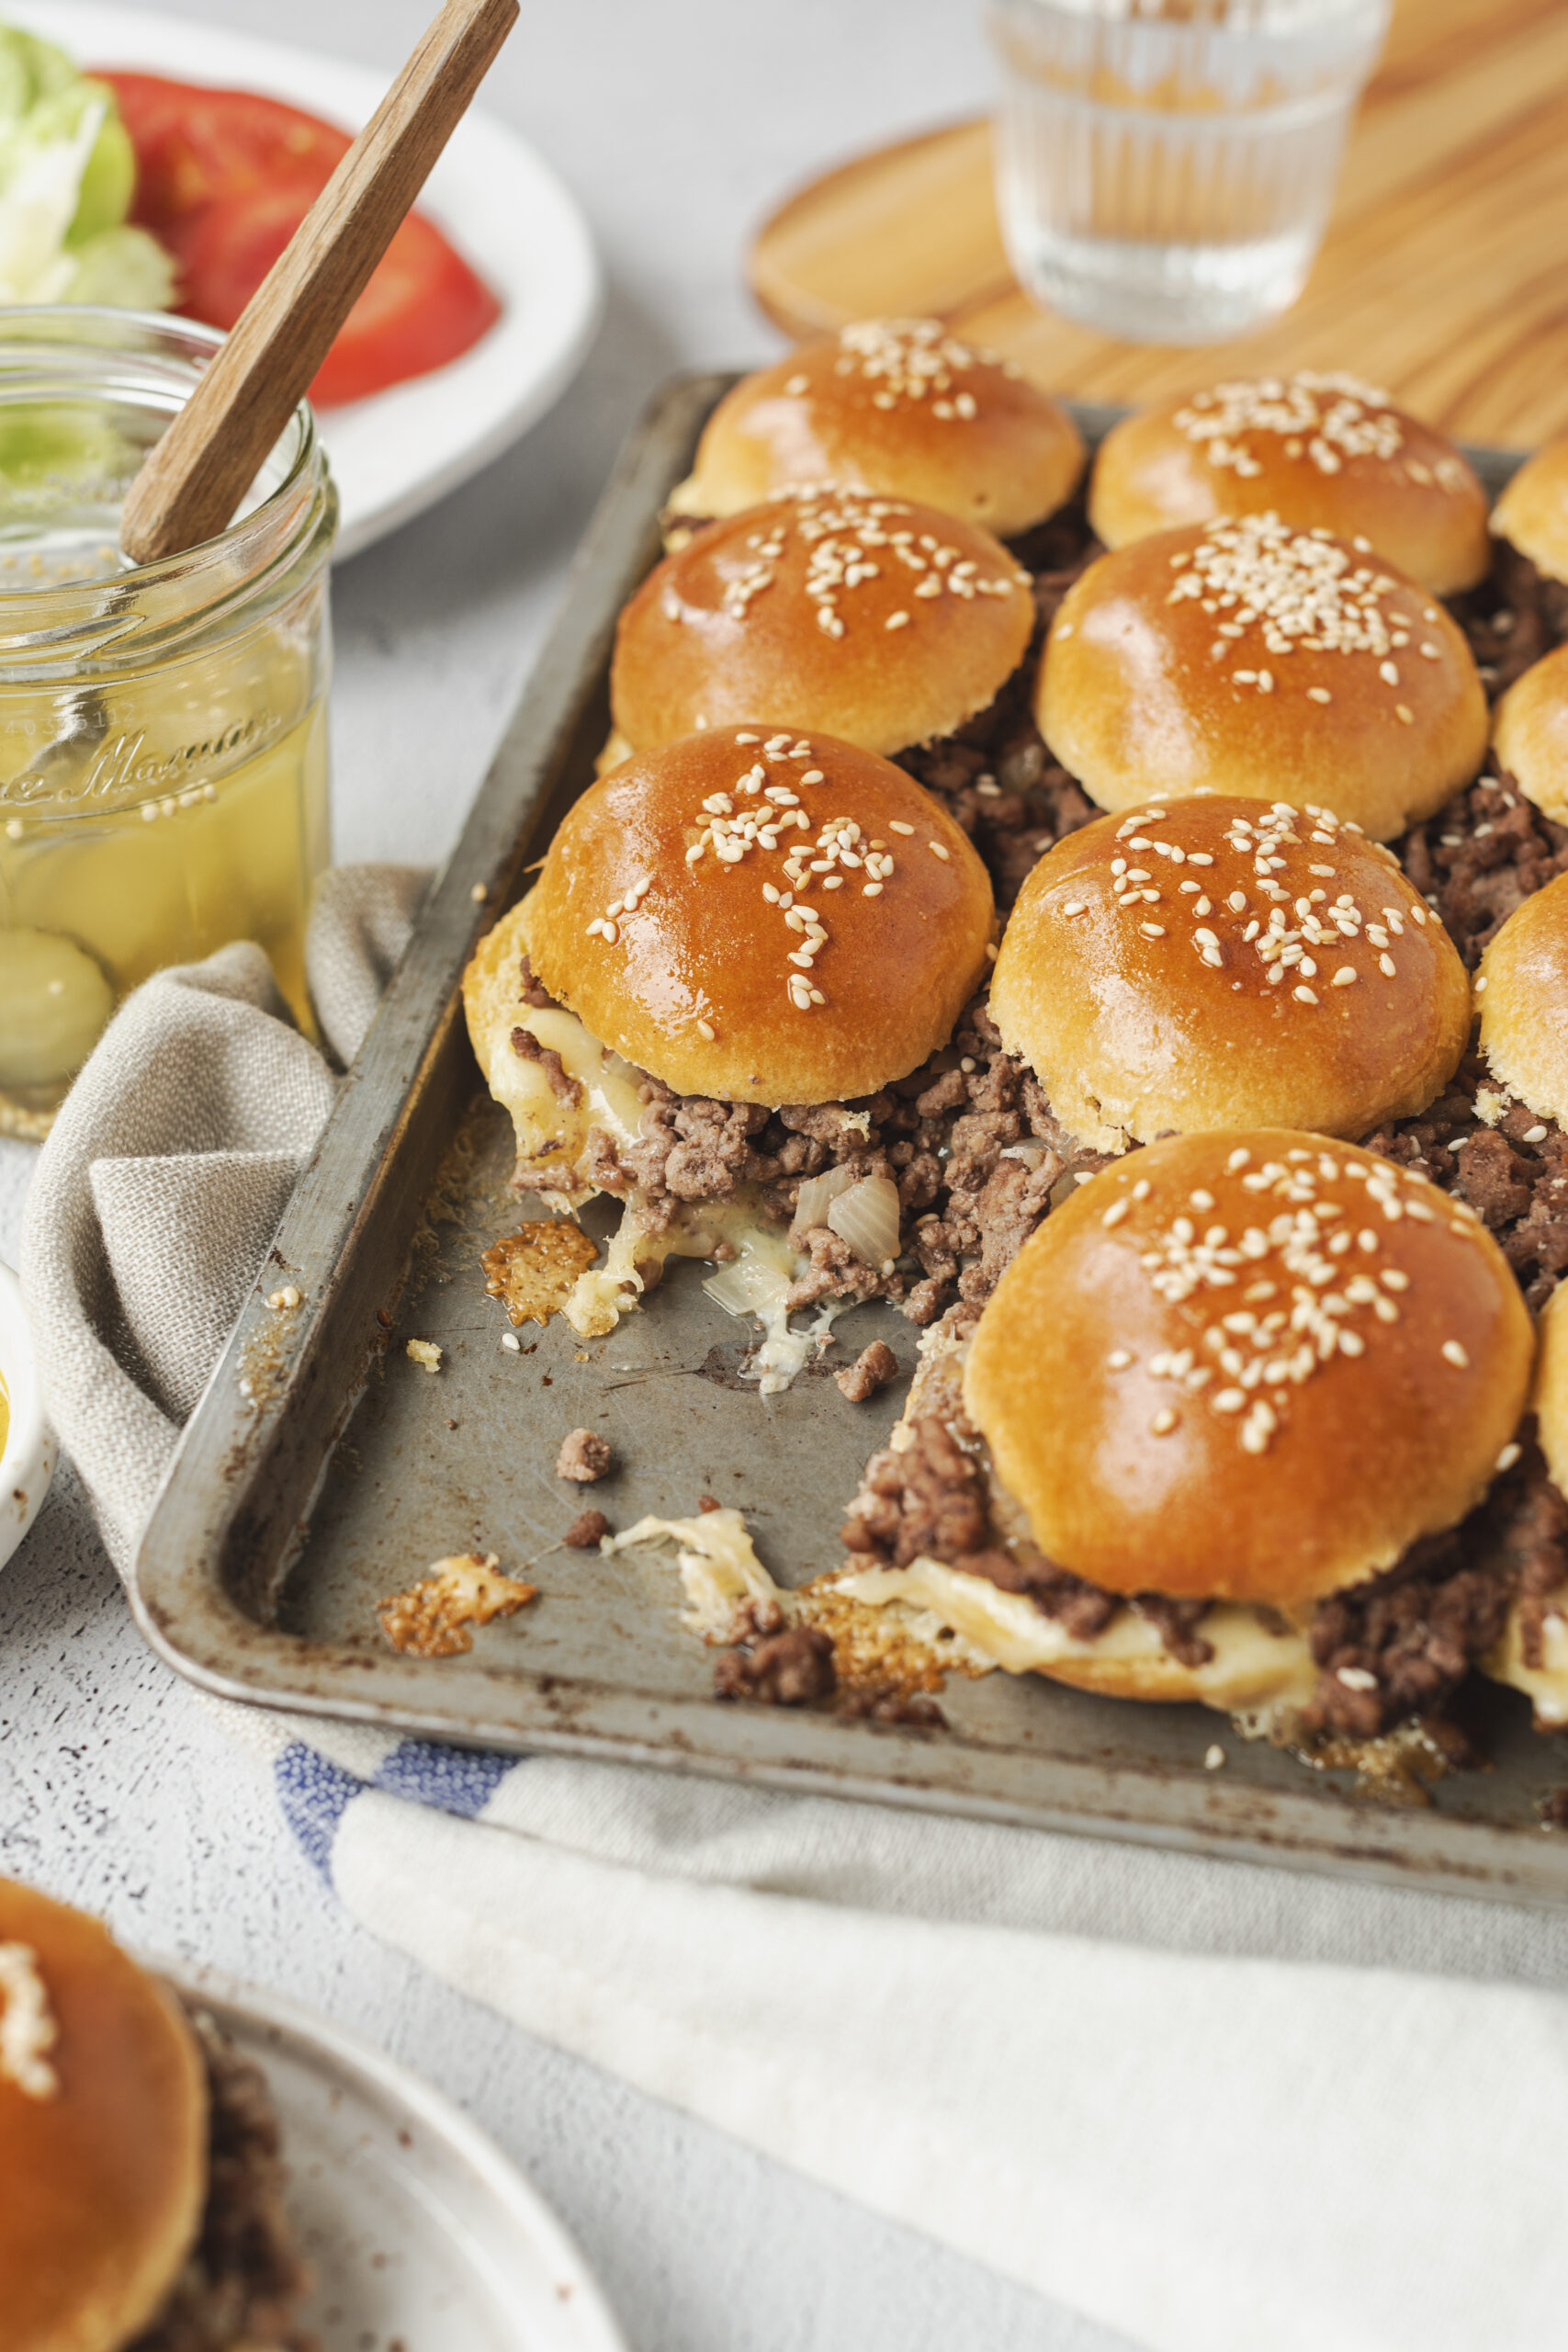
What makes these burgers ultra-easy to prepare is you make them more like sheet nachos than a burger.
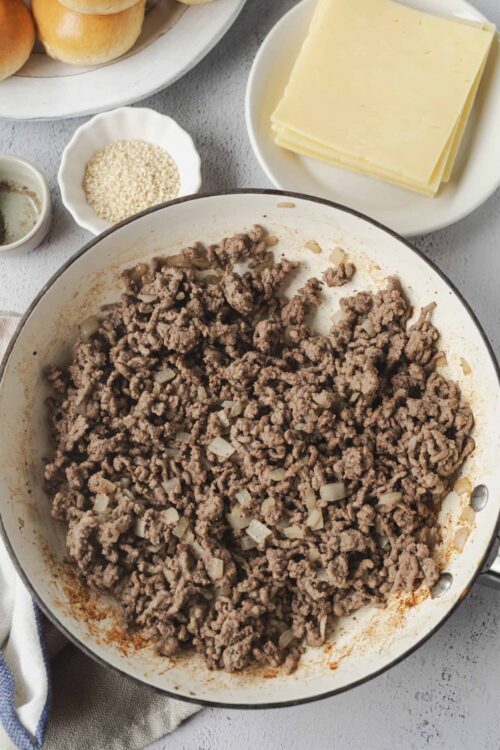
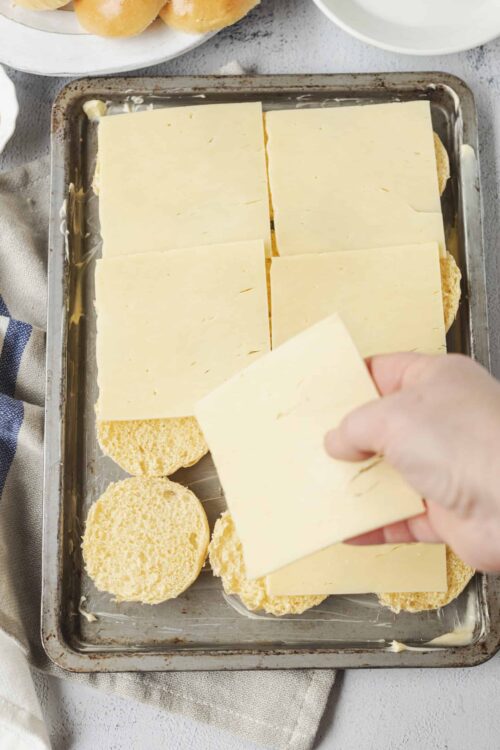
After you lay out all your bun bottoms on a cookie sheet or sheet pan, you simply top them with cheese and spread savory, fried ground beef, onions, and seasonings all over them, along with your more oven-lovin’ toppings. You can just scatter pickles and onions like rain because they’re going to get all sautéed by the burgers’ steam anyway. With the bun tops added, those moist buns kind of meld together and lock in that crumbled ground beef, saving you from having to shape all that burger meat into wee, little patties.
Kids just love sliders because they’re little, like them, and they complement a long list of sides, like BBQ Chicken-Stuffed Potato Skins, some crispy Air-Fried Onion Rings, some fried mushrooms, some Healthy Mac and Cheese, and/or a big, Crunchy, Munchy, Layered Salad.
How To Make Ahead And Store
You can keep these sliders in the fridge for 3 days, which I recommend doing by sliding leftovers onto paper plates and then sliding all that into a gallon freezer bag. To freeze these prepared sliders, which you can do (even if you put pickles and onions on them), simply wrap each individual burger in plastic wrap and then place those individually wrapped burgers into a larger freezer bag. Then, whenever you want a juicy little slider, you can pull one or three of them out, thaw them for a bit in the refrigerator, and heat them in 30-second blasts for one steamy, melty cheeseburger in seconds!
Serving Suggestions
For one flavorful meal, I highly recommend this spread: Cheeseburger sliders dressed just the way you like them; these easy, amazing Air-Fryer Onion Rings (plop one on top of that burger for ultimate crunchy-melty deliciousness); these Buffalo Wings and then a whole montage of condi dishes full of dips for burgers, onion rings, and Buffalo wings. Try this Blue Cheese Dip, this “bam-a-zing” as Josh (8) calls it, Buffalo Chicken Sauce, some ranch dressing, some ketchup, and some of this Cheesy Buffalo Chicken Wing Dip.
I know firsthand how hard you guys work every single day from witnessing the workload I’m barely lessening for a mom every time I cook for one of them. And until everybody else does say it, I will say it for them, … “Thank you, Moms.”
Cheeseburger Sliders
Ingredients
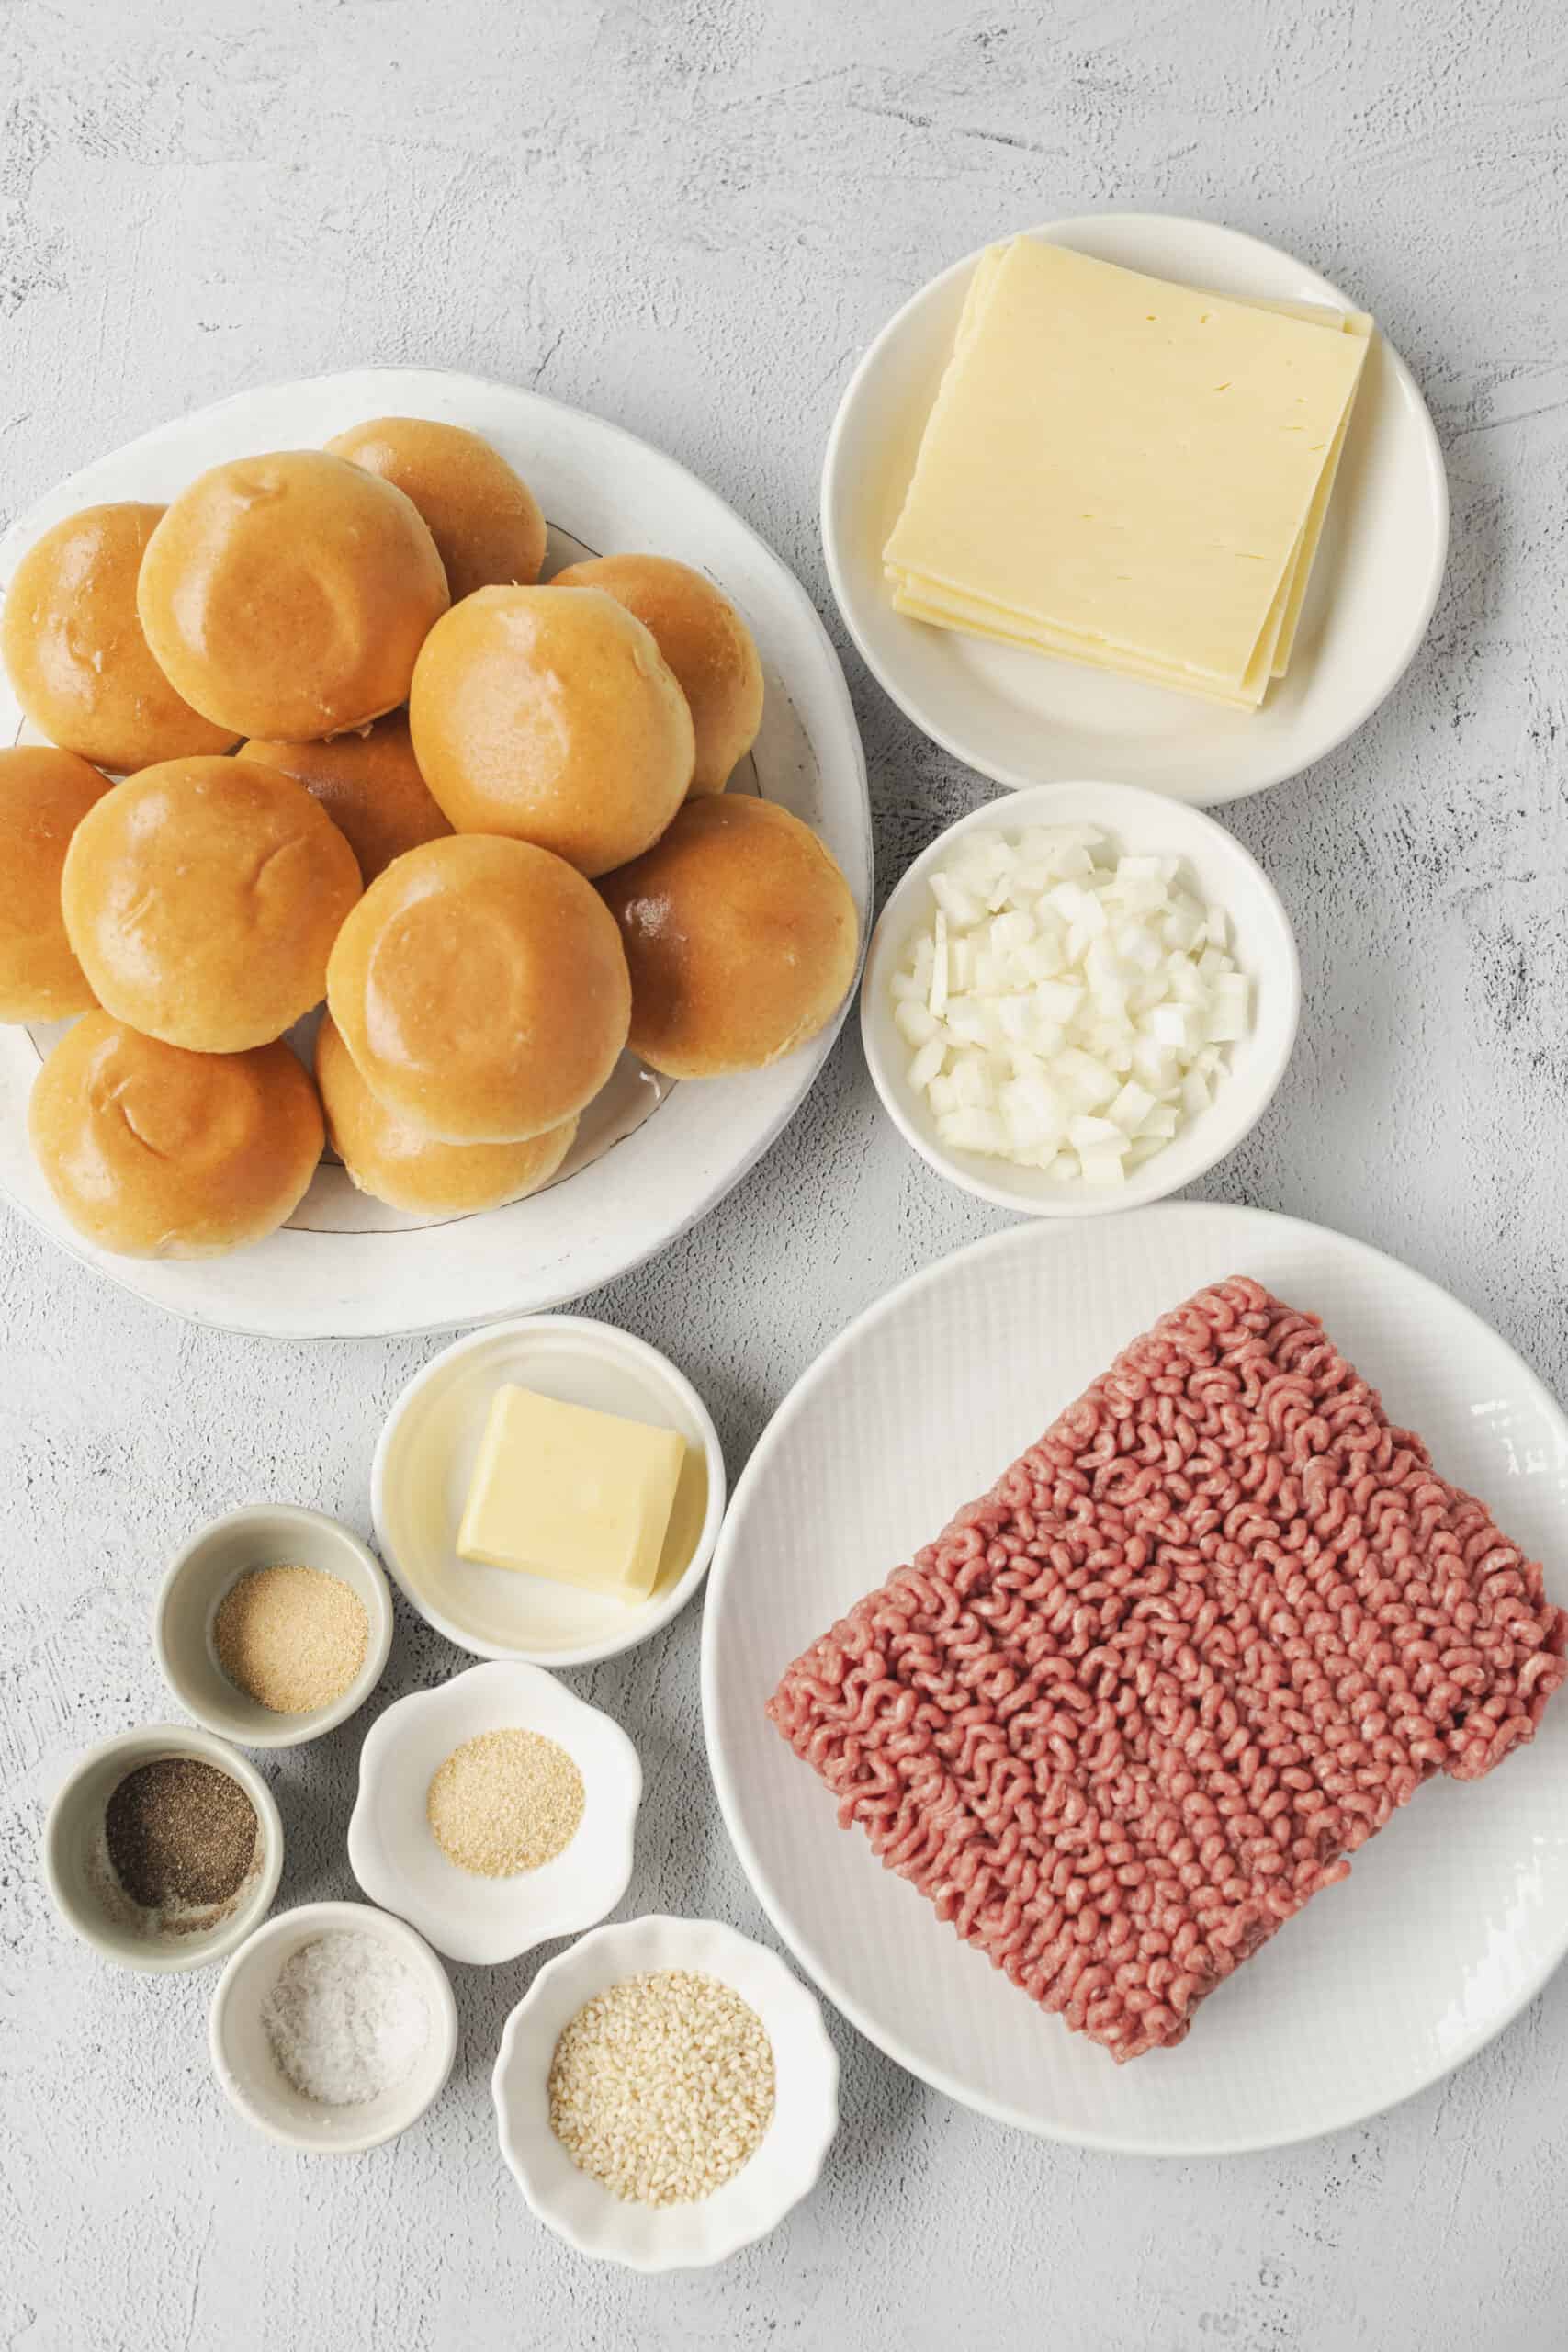
- 1 pound lean ground beef
- 3/4 teaspoon onion powder
- 1/2 teaspoon salt plus more to taste
- 1/4 teaspoon black pepper
- 3/4 teaspoon garlic powder
- 1/2 large yellow onion finely diced
- 12 slider buns
- 6 slices cheddar cheese
- 2 tablespoons unsalted butter melted
- 1 tablespoon sesame seeds
- Toppings such as lettuce or tomato slices (optional)
- Preferred dipping sauce such as ketchup or mustard (optional)
Instructions
- Preheat the oven to 350°F.
- Grease a baking sheet with butter.
- In a skillet over medium heat, cook the diced onion until translucent. Add the ground beef, salt, pepper, onion powder, and garlic powder. Cook until the beef is browned. Drain any excess fat.
- Slice the buns in half and place the bottom halves on the prepared baking sheet. Arrange a layer of the cheese slices over the buns, then evenly distribute the cooked beef on top. Cover with the top halves of the buns.
- Brush the tops of the buns with melted butter and sprinkle with sesame seeds. Bake in the preheated oven for 12 minutes or until the buns are golden and the cheese is melted.

- Serve warm with preferred toppings and dipping sauces.
Leave a Comment