Voortman has been inspired by baking for more than 60 years, making Turnovers, Shortbreads, Wafer cookies and more!
They are available in eighteen different varieties including: Vanilla, Strawberry, Chocolate, Peanut Butter, Lemon, Coconut Crème, Cookies’n Creme, as well as a selection of no sugar added options.
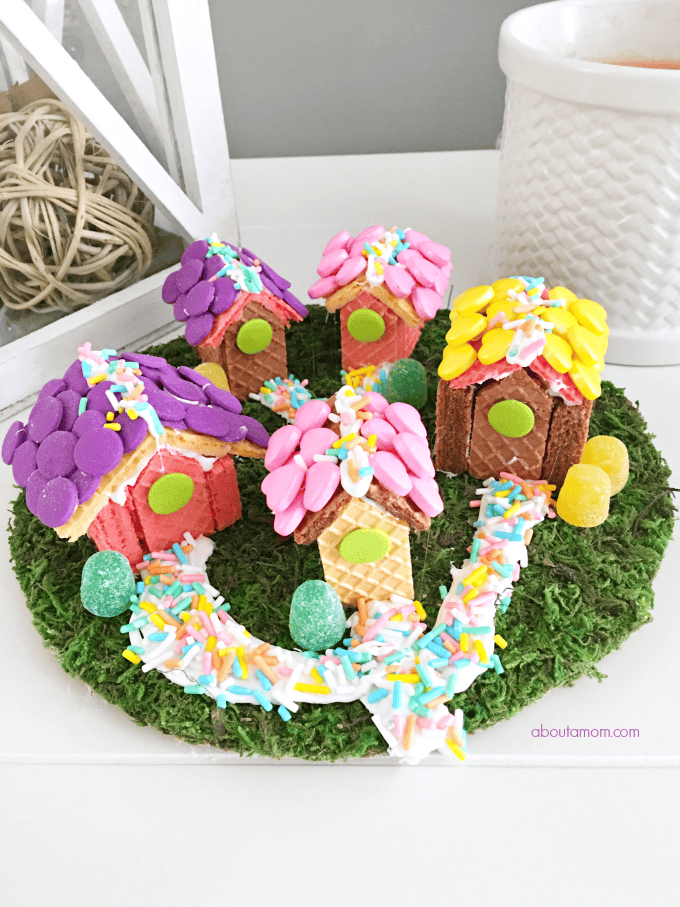
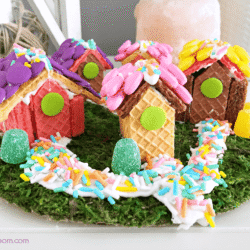
My family has long enjoyed these cookies, and I am thrilled to discover how perfect they are for food crafts and recipes. This wafer cookie village was so much fun to make!
My Inspired by Voortmans Wafer Cookie Village
I am in love with this sweet little wafer cookie village. It looks like the perfect home for fairies, doesn’t it? My son and I have always enjoyed making gingerbread villages for the holidays, and I love that this is something fun that can be done any time of the year. Food crafts are the best. You get to have fun making them, then you get the added bonus of eating it – although this was simply too cute to eat.

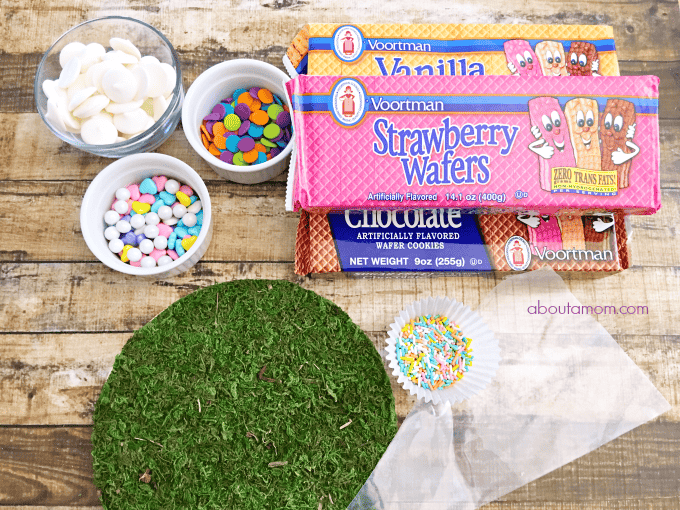
Supplies:
- Chocolate, strawberry, and vanilla Voortman wafers
- White melted chocolate candy melts
- Pastel Jimmies
- Green and yellow gumdrops
- Jumbo confetti sprinkles
- Pastel heart candies
- Fake moss
- Round 8″ cake board circles
- Decorating bag
- Scissors
- Hot glue
- Knife
Instructions:
Step 1: Trace an 8″ cake circle onto a piece of moss and cut out with scissors and hot glue your moss onto your cake circle.
Step 2: Melt the chocolate melts, pour into a decorating bag, and cut the tip off. To make your small houses:
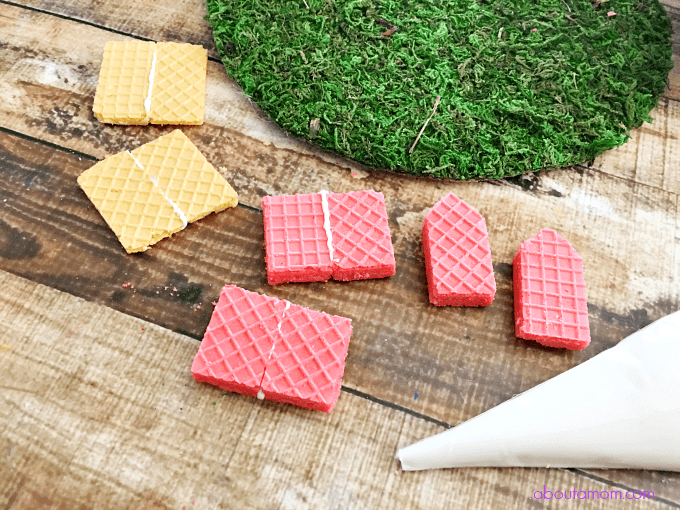
Step 3: Cut your wafers in half and cut the tops evenly to make a point on one side (they should be about 4 1/2″ high).
Step 4: Now cut two more wafers into 3″ pieces (as high as the lowest slant of your pointed pieces).
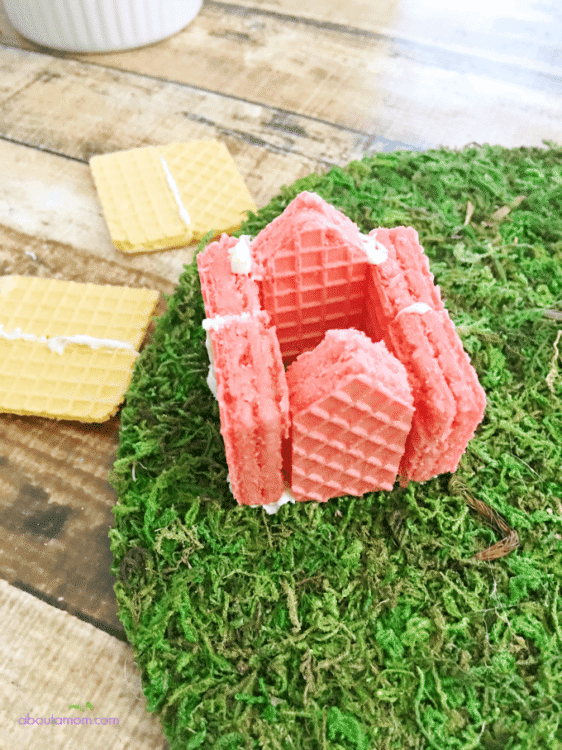
Step 5: Use your melted white chocolate to glue your house together, pointed pieces for the front and back and 3″ pieces for the sides of the house.
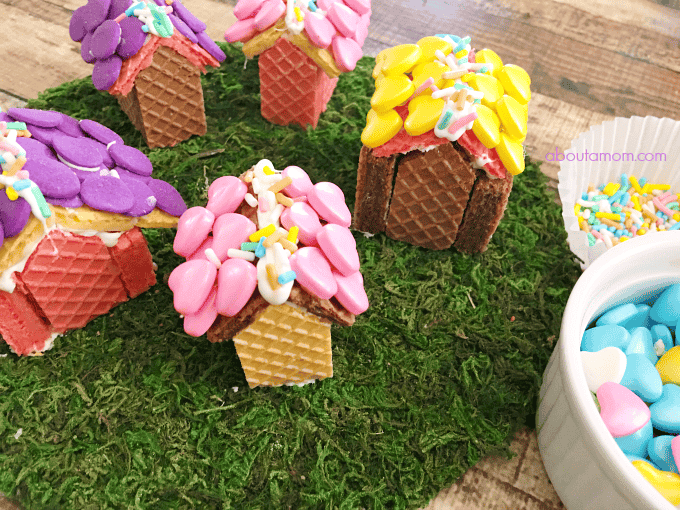
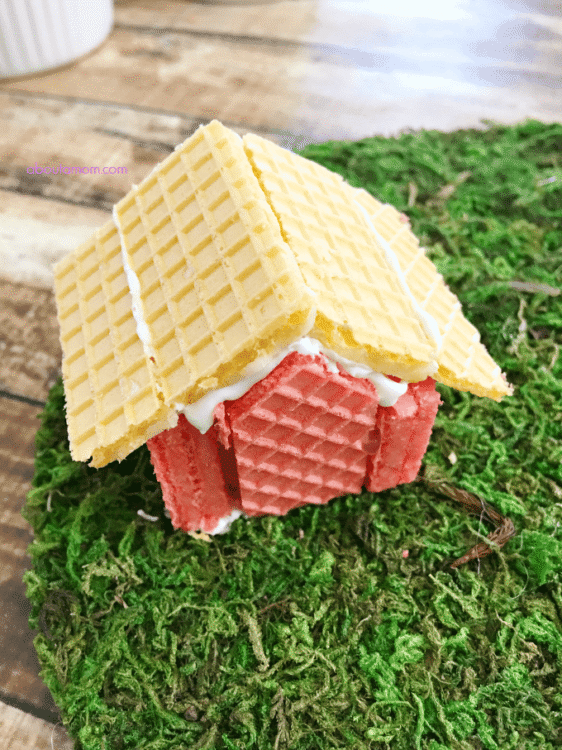
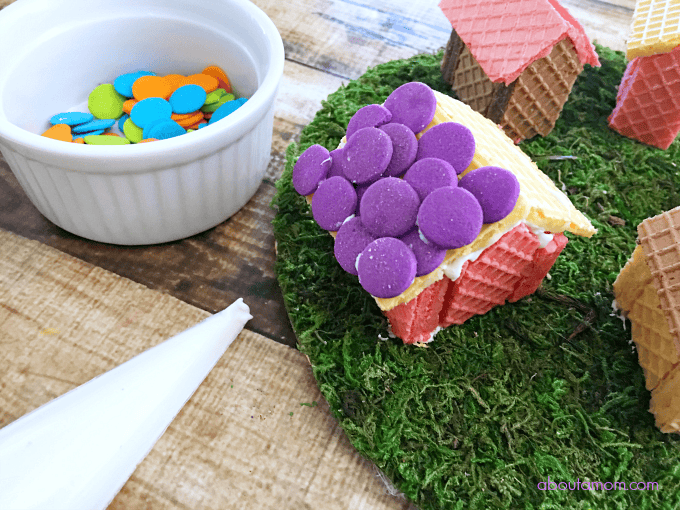
Step 6: Cut another color wafer in half, peel the top layer off of two pieces and use for the roof.
Step 7: To make your larger houses follow the same directions for the small houses except make four 3″ sides and “glue” two together for the sides of the houses.
Step 8: Use your melted chocolate to glue either the heart candies or jumbo sprinkles onto each roof.
Step 9: Frost the middle of each roof with your melted chocolate and top with sprinkles.
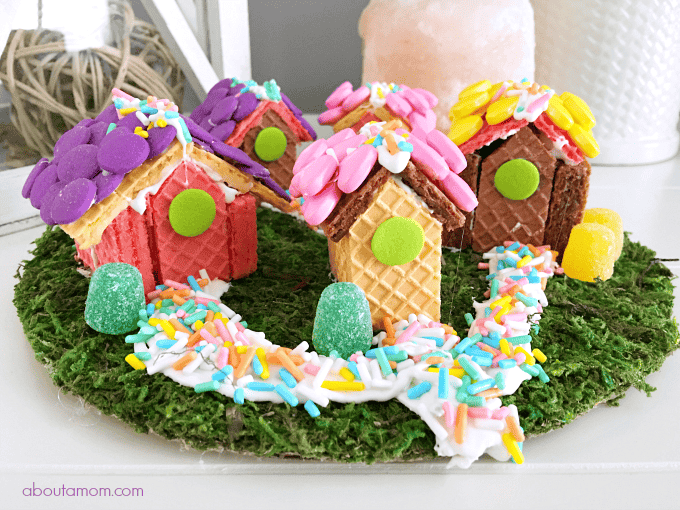
Step 10: Use your melted chocolate to glue your houses into the moss.
Step 11: Now make a path with your chocolate from house to house and top with sprinkles to look like roads.

Step 12: “Glue” a gumdrop next to each house for bushes and your got yourself a mini village.
Here are some wafer creation tips and guidelines to help you create your wafer work of art:
Wafers can be split apart or cut into shapes easily. Use a sharp knife to create clean edges and be careful!
Use a sticky substance to help ‘glue’ your materials together. Our easy icing recipe below is a perfect example!
If you’re building a wafer structure, test your building techniques and applications on a small sample first before applying it to your design.
If you’re creating different pieces, let them set first before attaching.
If you’re creating a wafer recipe, be sure to think about taste appeal and presentation. We want your photo to look good enough to eat!
After you complete your wafer creation, be sure to take a photo of it as soon as possible. This will ensure that it will keep its shape and texture. Wafers will absorb moisture and may split or soften over time.
Inspired by Voortman Wafer Cookie Village
Ingredients
- Chocolate strawberry, and vanilla Voortman wafers
- White melted chocolate candy melts
- Pastel Jimmies
- Green and yellow gumdrops
- Jumbo confetti sprinkles
- Pastel heart candies
- Fake moss
- Round 8″ cake board circles
- Decorating bag
- Scissors
- Hot glue
- Knife
Instructions
- Trace an 8″ cake circle onto a piece of moss and cut out with scissors and hot glue your moss onto your cake circle.
- Melt the chocolate melts, pour into a decorating bag, and cut the tip off. To make your small houses:
- Cut your wafers in half and cut the tops evenly to make a point on one side (they should be about 4 1/2″ high).
- Now cut two more wafers into 3″ pieces (as high as the lowest slant of your pointed pieces).
- Use your melted white chocolate to glue your house together, pointed pieces for the front and back and 3″ pieces for the sides of the house.
- Cut another color wafer in half, peel the top layer off of two pieces and use for the roof.
- To make your larger houses follow the same directions for the small houses except make four 3″ sides and “glue” two together for the sides of the houses.
- Use your melted chocolate to glue either the heart candies or jumbo sprinkles onto each roof.
- Frost the middle of each roof with your melted chocolate and top with sprinkles.
- Use your melted chocolate to glue your houses into the moss.
- Now make a path with your chocolate from house to house and top with sprinkles to look like roads.
- “Glue” a gumdrop next to each house for bushes and your got yourself a mini village.

How cute and creative! I don’t know that I could keep everyone out of the cookies long enough to do a project like that!
Looks so cute. What a neat idea
This is so cute, my granddaughter would love to make this
So cute! Thank you for sharing at Merry Monday!
I love this, it’s so cute and yummy!
This Wafer cookie village is so cute and looks like a lot of fun to make. My daughter and I would love to make this for sure! Thanks for sharing.
How fun! They’re like little spring gingerbread houses! My kids would love this! Thanks for sharing with us at Delicious Dishes recipe party. Hope to see you again this week!
This is so cute and creative. Love it ! This would be fun to do.