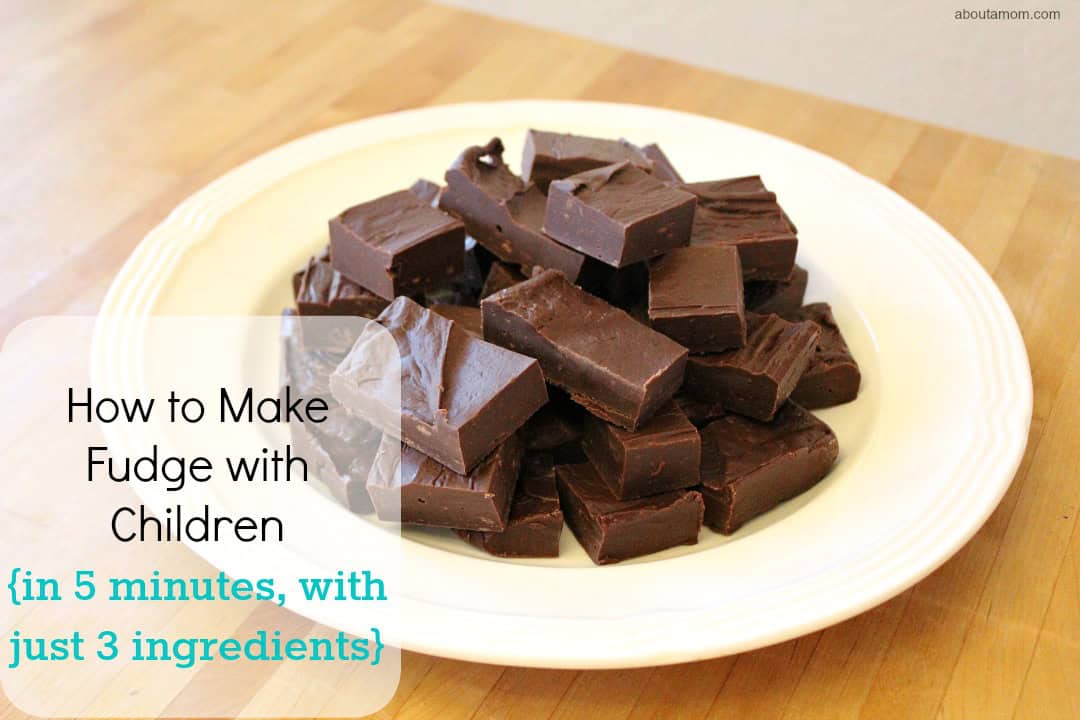
A three-ingredient fudge that brings seaside candy shop joy straight into your kitchen.
There’s something undeniably magical about old-fashioned candy shops—the kind tucked into the side streets of quaint seaside towns like Cape Cod, Massachusetts; Cape May, New Jersey; or Ogunquit, Maine (three of my favorite coastal destinations here on the East Coast). I could spend hours watching saltwater taffy stretch and pull, breathing in the warm, sugary air, and tasting my way through rows of gleaming fudge slabs in every flavor imaginable. Peanut butter ripple, rocky road, maple walnut… oh my goodness, all the flavors! Each one is like a souvenir you can eat. Fudge has always been my favorite kind of candy, partly because it tastes incredible and partly because it feels wrapped up in happy vacation memories.
That’s exactly the feeling I want to bring home to my kids, and this ridiculously easy, three-ingredient, eight-minute fudge does it every single time. (Don’t forget to plan an extra two hours for refrigeration and setting.) It’s a staple in our house for good reason—we’ve literally made it three times in one week! (Holiday party? Check. After-school playdate? Check. A batch just for us? Of course.) What makes it even more special is that my kids can basically make it on their own—minus the hot-bowl moments, which still require a grown-up and a pair of oven mitts.
If you ever find yourself scrambling for a quick dessert to bring to a gathering, this fudge is a total lifesaver. It’s the kind of simple treat people keep reaching for. Before long, someone will inevitably ask you for the recipe, and there’s nothing more delightful than saying, “It took eight minutes, and the kids made it!” Bringing a little candy shop magic into your kitchen has never been easier.
A bite of fudge history and some fun variations
If you’re curious about where fudge came from, the story is as sweet as the treat itself. Most food historians believe fudge was a happy kitchen accident in the late 1800s—someone “fudged” a batch of caramel, and the softer, creamier confection was born. By the early 1900s, fudge had become a beloved American candy, especially at coastal destinations and tourist towns, where candy makers whipped up fresh batches in big copper kettles to lure passersby with the smell of warm chocolate. That tradition lives on today, which is why you can still find incredible fudge lining the counters of beachside shops from New England to the Jersey Shore. Making it at home with kids keeps that tradition going in your own way—minus the giant kettles and plus a microwave.
Once you’ve mastered the base recipe, the fun really begins. This fudge takes well to just about any mix-in you can dream up—think chopped nuts, crushed peppermint candy, sprinkles, mini marshmallows, caramel swirls, butterscotch chips, or even a sprinkle of flaky sea salt. You can swap the chocolate chips for dark chocolate, milk chocolate, white chocolate, peanut butter chips, or a combination of two flavors for a marbled effect. Let the kids choose their own mix-ins and watch how creative (and proud) they become.
How do I store leftovers?
Store leftover fudge in an airtight container in the refrigerator for up to 1 week. If you prefer a firmer, candy shop texture, keep it chilled; for a softer bite, let the pieces sit at room temperature for 10 to 15 minutes before serving.
You can also freeze fudge for up to 2 months—just wrap the slab (or individual squares) tightly in plastic wrap and place it in a freezer-safe bag. Thaw in the refrigerator overnight before enjoying.

Serving suggestions
Cut the fudge into small squares and serve it on a dessert platter alongside fresh fruit, cookies, or other bite-size treats. It also makes a great addition to holiday cookie boxes, teacher gifts, or party dessert tables. Wrap a few pieces in wax paper and tie with ribbon or tuck them into small tins for an irresistible homemade gift. For a fun family activity, set up a “fudge bar” with toppings like crushed cookies, sprinkles, or chopped nuts and let everyone customize their own pieces (just press the fudge into the toppings—or the toppings into the fudge—and they’ll stick!). However you serve it, this simple treat always disappears fast.
For more fun fudge recipes, try this Easy Peppermint Fudge Recipe, this Jelly Bean Fudge Recipe, or this Fall Favorite Pumpkin Fudge Recipe next.

How to Make Fudge with Children
Ingredients
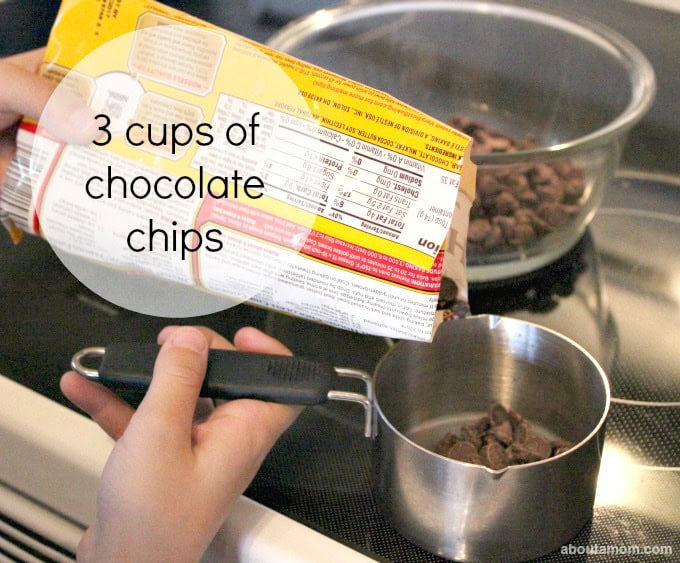
- 3 cups semisweet chocolate chips or any chip flavor you like
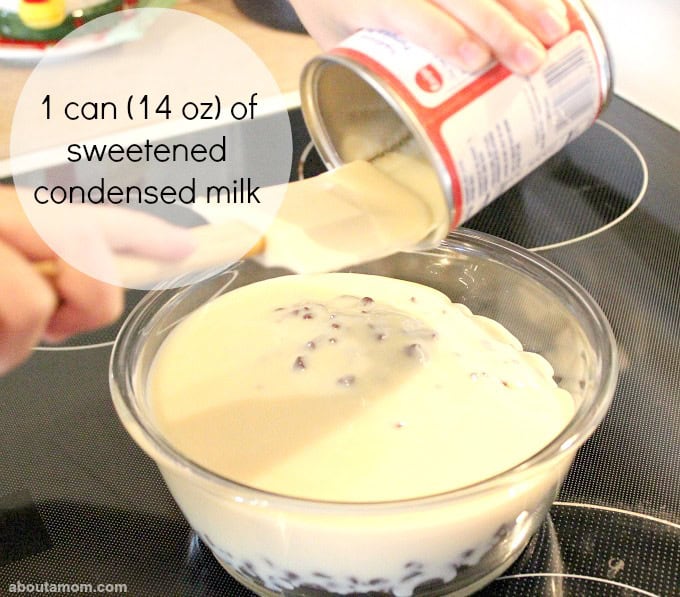
- 1 can sweetened condensed milk (14 ounces)
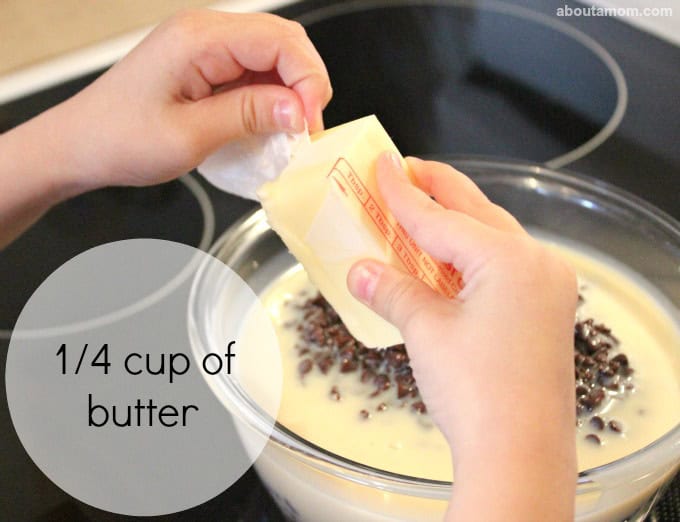
- ¼ cup butter
- Nuts, sprinkles, or other toppings optional
Instructions
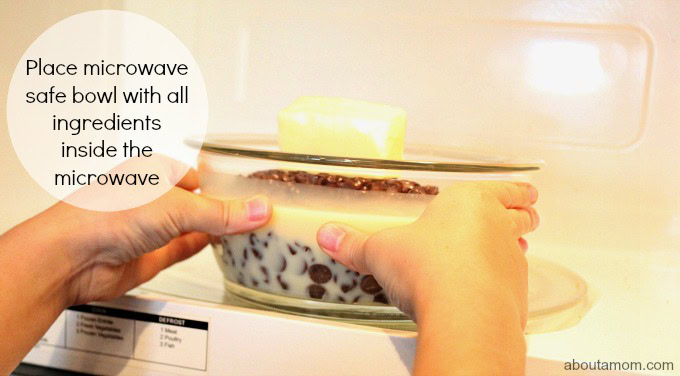
- Grease a glass baking dish. (We use an 8×8-inch for thick fudge and a 13×9-inch for thin fudge.) Place the chocolate chips into a microwave-safe bowl.
- Add the sweetened condensed milk.
- Add the butter.
- Place the bowl inside your microwave.
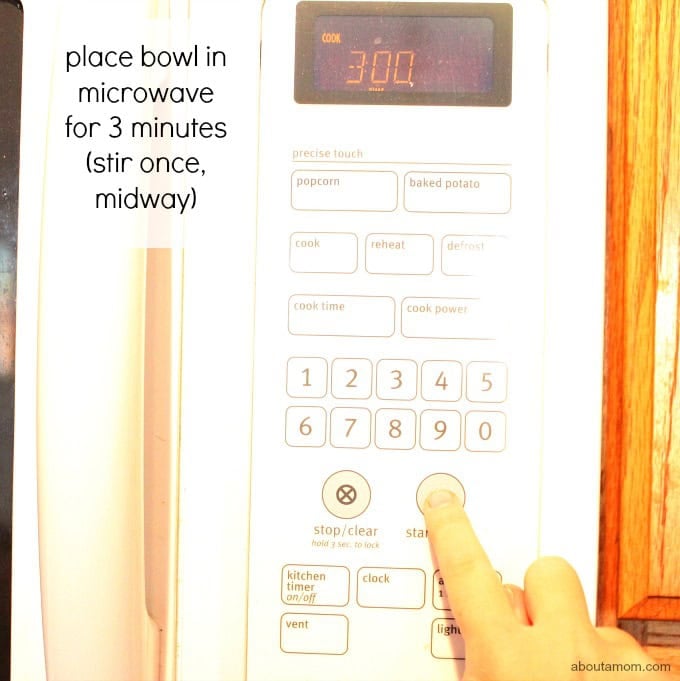
- Microwave for 3 minutes, making sure to stir the fudge mixture halfway through.
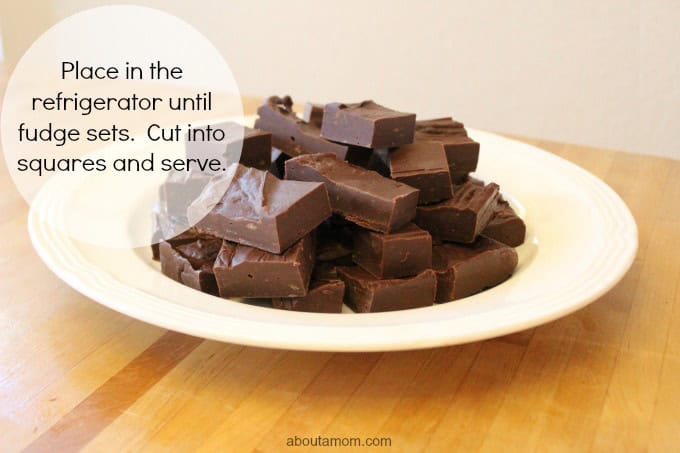
- Be careful, mixture will be hot. Pour the fudge into the prepared baking dish. Optional: add nuts, candies, or toppings.
- Place the dish in the refrigerator and chill for approximately 2 hours, or until the fudge sets. Cut into squares, then serve.

I love fudge and this looks like such an easy recipe. Thanks for sharing the recipe.
Thank you! Enjoy! 🙂
Sounds good and easy!!!
Thank you. 🙂
I love chocolate. I had to make myself take a break from chocolate. It has been a month since I had some chocolate. Those brownies make me want to start eating chocolate.
While this is an excellent fast simple recipe for children. It is not the best of the fudge recipes I have made so far this month. I am going through a large collection of different fudge recipes this month. This was the first recipe I used, and I made it up twice. Once without nuts, and the second time with nuts. My wife and daughters told me to ditch the recipe, and each only ate one piece. My grandsons finished the two batches off since the women wouldn’t eat any after the first taste.
Thanks for your feedback Wilson, hope you have more luck with other recipes 🙂