My kids love looking for butterflies in the spring and summer. We love examining the lovely colors and patterns of the butterflies they find. Most often what they find are moths, but that does not take away from their excitement. They have found some really pretty, unique and large moths.
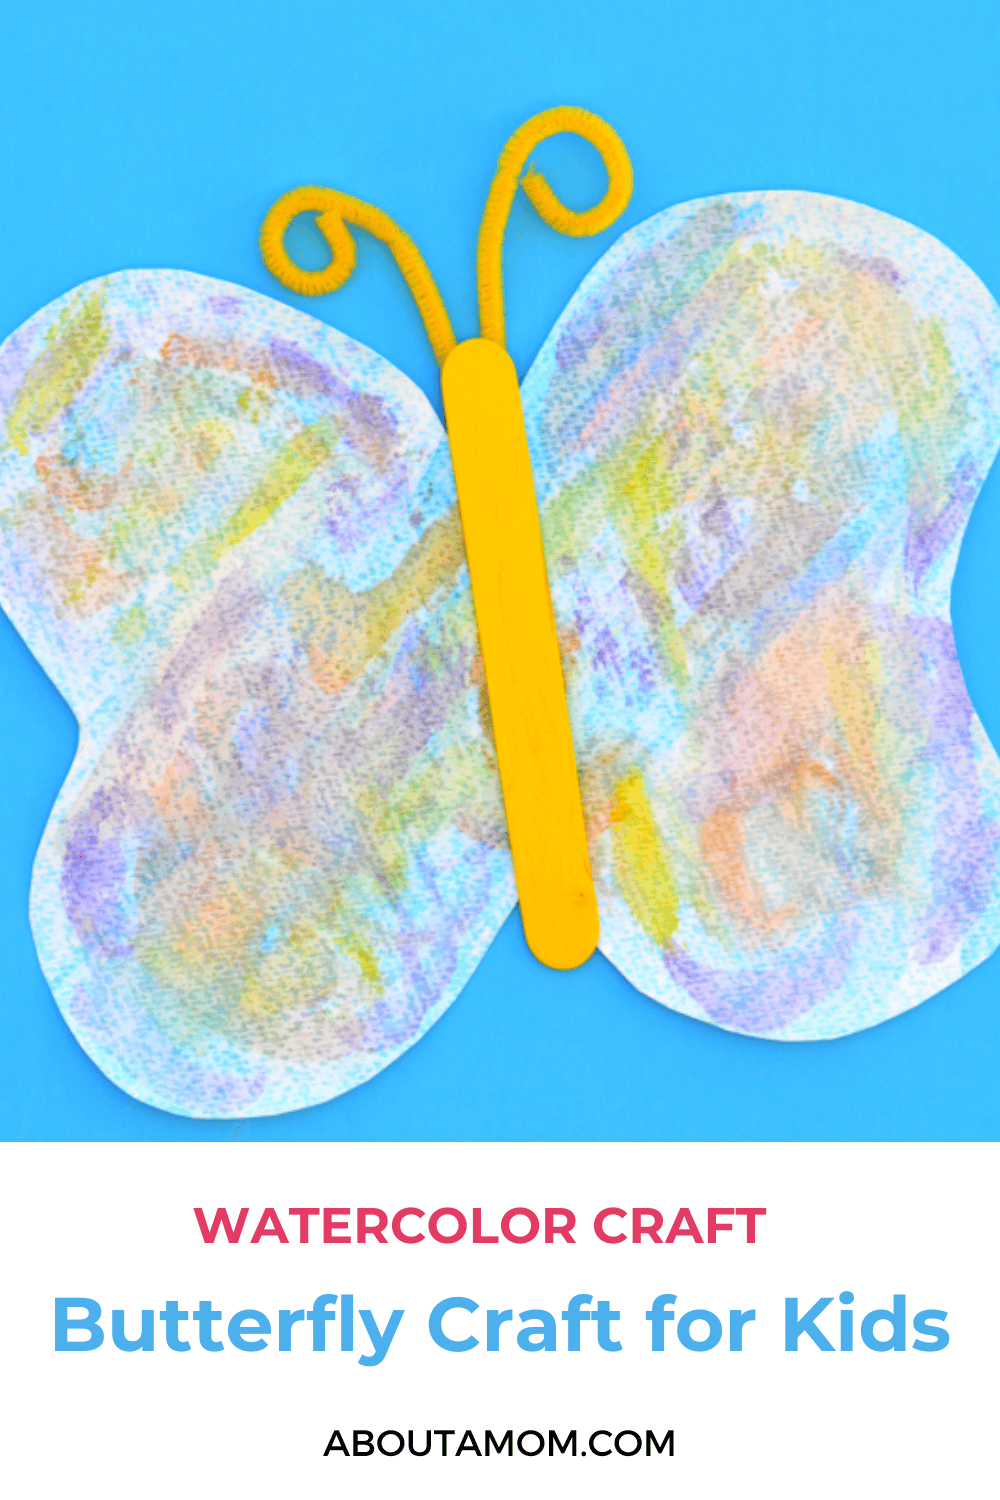
As we eagerly await the appearance of butterflies this spring, we pulled out our watercolors to make our own unique butterflies.
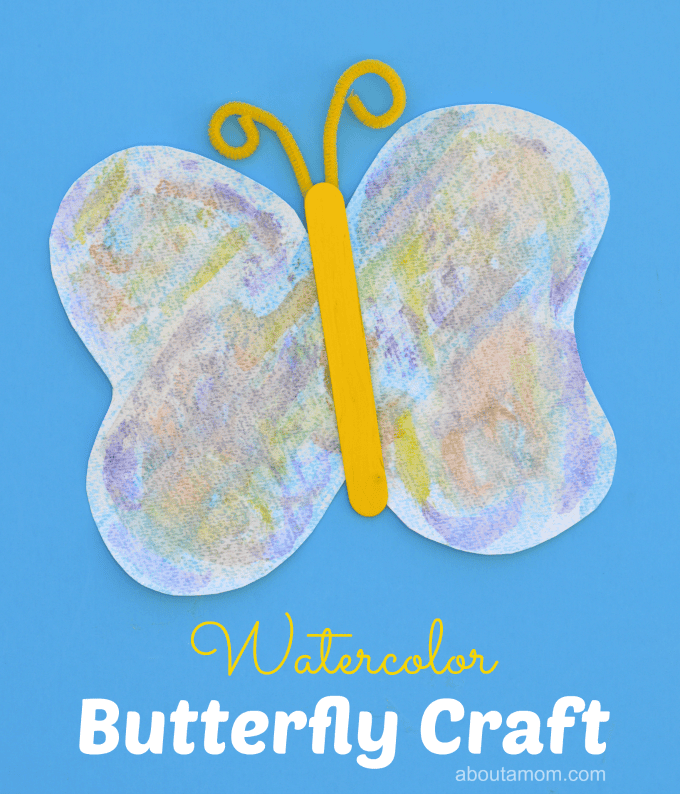
We don’t use our watercolor paints enough. It seems like we are always quick to grab the tempera or acrylic paints, but watercolor paintings can be so pretty. I love how you can blend colors with watercolor paints.
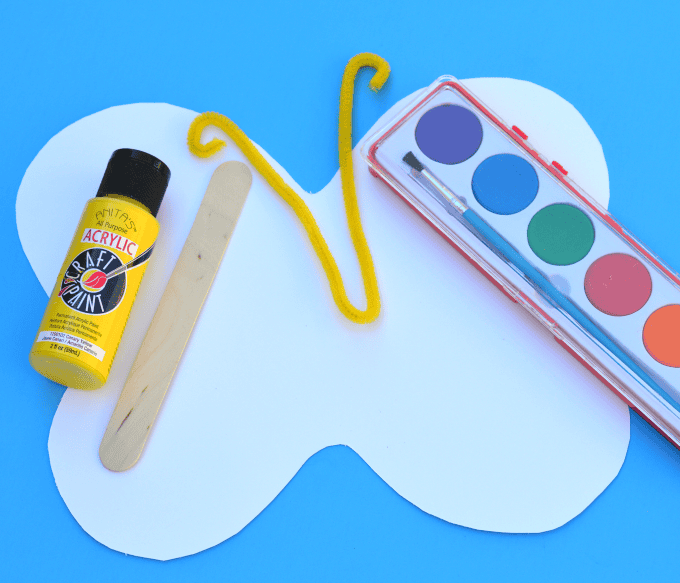
Supplies:
- Watercolor paints
- Watercolor paper or card stock (you want something thick enough to absorb the paint and not tear)
- Wooden craft stick
- Tempera or acrylic paint (this is to paint the craft stick)
- Pipe cleaner
- Butterfly template
- Glue
- Scissors
Directions:
1. Paint craft stick color of your choosing and allow to dry. You just need to paint one side of the craft stick. The other side will be glued to the butterfly.
2. Print Butterfly template.
3. Use watercolors to paint butterfly and allow to dry. There is no right way to paint the butterfly. Each one will be unique.
4. Once the butterfly has dried (it should dry fairly quickly), cut the butterfly out.
5. Glue the craft stick to the middle of the butterfly.
6. Fold the pip cleaner in 1/2 and curl both ends to make antennae. Glue or tape this to the back of the butterfly. I find that tape works better for attaching the pipe cleaner and gets the job done quicker. By the time we get to the pipe cleaner step of the project, the kids are usually ready to be done.
Written by About a Mom contributor, Kim. Kim, the mama behind The Resourceful Mama, is a medical social worker turned stay at home mom to three. She enjoys sharing simple crafts and activities, parenting and homemaking tips, and a lot of holiday fun.
These are really pretty! Kids love making butterflies, this is one to try!